Choosing the Right Flute Count for CNC Router Bits: A Material-Based Guide
Why Flute Count Matters
Flute Count for CNC Router are the cutting edges or feed channels on a CNC router or router bit. Every flute engaging the workpiece removes a slice of material with each rotation—and also needs a place to send the resulting chips for evacuation.
This simple fact creates a trade-off: Add more flutes and you increase the number of cutting edges per rotation (leading to a better finish and potentially higher material removal rates with proper feed), but you reduce the available space for chip evacuation channels. Limited chip removal increases heat, can cause burning or melting in some materials, and shortens the tool’s lifespan.

Common Router Bit Flute Counts and What They Do
1 – Flute
Mostly seen in plastic materials and some specialized sign-making. The singular flute maximizes chip evacuation area and minimizes heat buildup—useful when the material is prone to melting, such as acrylic. The finish is generally rougher than multi-flute bits, so this is rarely the first choice for fine woodworking.
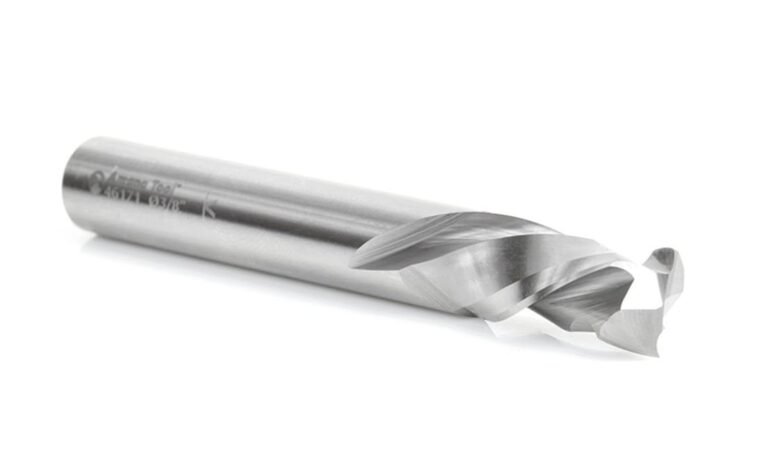
2 – Flute
This is the most common flute count for general woodworking purposes and beginner CNC work. Two flutes hit a sweet spot: good chip clearance for deep cuts and aggressive feed rates, while still offering a decent surface finish. If you keep only one type of spiral bit for daily work, the 2-flute is the safest bet.


3 – Flute
Three flutes provide a smoother finish because more cutting edges engage the material with every revolution. This makes 3-flute bits attractive for hardwoods, non-ferrous metals, and composite materials when finish quality is critical. The downside: less space for chip evacuation, so you must carefully manage feed and speeds to avoid clogging or excess heat.
4 – Flute and Higher
Four or more flutes are common in end mills used for steel and other metals where tight tolerance and dimensional accuracy are paramount. In wood and plastic, these bits can quickly clog and generate high heat; they are usually only used for non-ferrous metals or where strong coolant and chip evacuation systems are in place.

Matching Flute Count to the Material
Wood (Softwoods and Hardwoods)
For general woodworking, a 2-flute bit is the standard choice. It balances surface finish with chip clearance, works well for deep pockets and slotting, and is forgiving when you’re dialing in your feeds and speeds. Use a 3-flute bit for hardwoods or when the final surface is visible and you want to minimize sanding. Avoid 4+ flutes unless you know how to manage your feed rate to prevent chips from packing into the flute valleys.
Plastics and Acrylics
Soft plastics and acrylics are heat-sensitive. Use a 1 or 2-flute bit to maximize the chip evacuation area and reduce the chance of melting. Slowing the spindle speed isn’t always the solution. Often, higher spindle speeds combined with appropriate feed rates and fewer flutes keep the bit cleaner because chips are evacuated more quickly.
Aluminum and Non-Ferrous Metals
Non-ferrous metals benefit from more cutting edges for a cleaner finish. 2 or 3-flute bits are common for aluminum. If you move to a 4-flute cutter, ensure you have excellent chip evacuation and consider using a coolant or compressed air to clear chips. Feeds and speeds for metals are a different ball game, so always follow the manufacturer’s recommendations for the specific metal and tooling.
Composites, HDU, and PVC
These materials are often abrasive and produce fine, dusty chips. A 2-flute bit provides reliable chip clearance and a good surface quality. A 3-flute bit can be used for a finer finish, but only if your dust collection system can keep up; otherwise, the extra flutes will clog quickly.

Practical Guidelines and Decision Rules
- The Golden Rule: Fewer flutes = better chip clearance; More flutes = smoother finish.
- If you are unsure where to start, default to a 2-flute bit and adjust your feed rate and RPM from there.
- Deep cuts, slots, and pocketing generally prefer fewer flutes. Finishing passes can use more flutes for a superior surface.
- Match the cutter’s overall engineering (spiral, coating, carbide grade) to the material, as the flute count alone is not everything.
Quick Tip: If you notice burning, melting, or accelerated bit wear, try reducing the number of flutes or increasing chip load (e.g., decrease depth of cut, increase feed rate, or use air/dust collection).
Fast reference scheme
| material | Recommended Psalms | Why |
|---|---|---|
| Soft wood | 2 | A good balance in clearance and finish |
| Solid wood | 2-3 | Additional flute for a smoother finishing final passes |
| Plastic / acrylic | 1-2 | Max chip space to prevent fusion |
| Aluminum | 2-3 (4 with cooling liquid) | Finishing + controlling the chip. The cooling liquid helps the highest flute charges |
| HDU / pvc / vehicles | 2-3 | Dust and finish evacuation balance |
Example Workflow: Choosing the Flute Count for a Job
- Define the Cut: Identify the material and determine if the cut is a roughing pass or a finishing pass.
- Select a Starting Flute Count: Choose a starting point based on the material (2-Flute for wood/general; 1-2 for plastic; 2-3 for aluminum).
- Test and Verify Chip Evacuation: Set a conservative Depth of Cut (DOC) and run short test cuts to verify chip evacuation and finish.
- Adjust and Refine: Adjust the Feed Rate and RPM to achieve the desired surface quality without heat or clogging—only increase flutes if the chip path remains clear.
There isn’t one best flute count for every job—the right choice depends entirely on your **material**, the **type of cut**, and your machine’s **setup**. For a reliable starting point, keep a **2-flute spiral bit** in your toolbox and expand your collection from there as you dial in your feeds and speeds.