


Good kitchen cabinet 3d models are the ones you can build a real kitchen from: cabinets with believable construction, doors and hardware modelled as separate parts, and dimensions that match the cabinet sizes real manufacturers sell. Buy a set that passes those three checks and you can lay out a client kitchen in an afternoon; buy a pretty render prop with a single merged mesh and you will spend that afternoon fighting it. This guide teaches you how to audit a cabinet model before you pay for it — and how to assemble a complete kitchen from model sets once you own them.
Key takeaways
- Judge construction first: a usable cabinet model has a carcass, doors, drawers and hardware as separate, named parts — not one merged shell.
- Check dimensions against standard cabinet widths and heights before anything else; a model that ignores real sizes will break your layout.
- Modular sets beat one-off hero models: a family of base, wall and tall units in matching style is what lets you design a whole kitchen.
- Pick formats your pipeline actually opens, and confirm the licence covers client and commercial work before you present a render.
- Assemble kitchens in a fixed order — room shell, tall units, base run, wall units, then details — and the layout stays editable to the end.
What should you check before buying kitchen cabinet 3d models?
Check four things, in this order: construction, dimensions, modularity and licence. Construction tells you whether the model behaves like a cabinet or like a sculpture. Dimensions tell you whether it fits a real room. Modularity tells you whether one purchase covers a whole kitchen or just one corner of it. The licence tells you whether you may legally show the result to a paying client.
Most designers reverse that order — they fall for the render, then discover the problems. Work through the checks below in sequence and you will reject bad sets in minutes instead of discovering their flaws mid-project, when the deadline owns you.




How is a real cabinet built — and how should the model copy it?
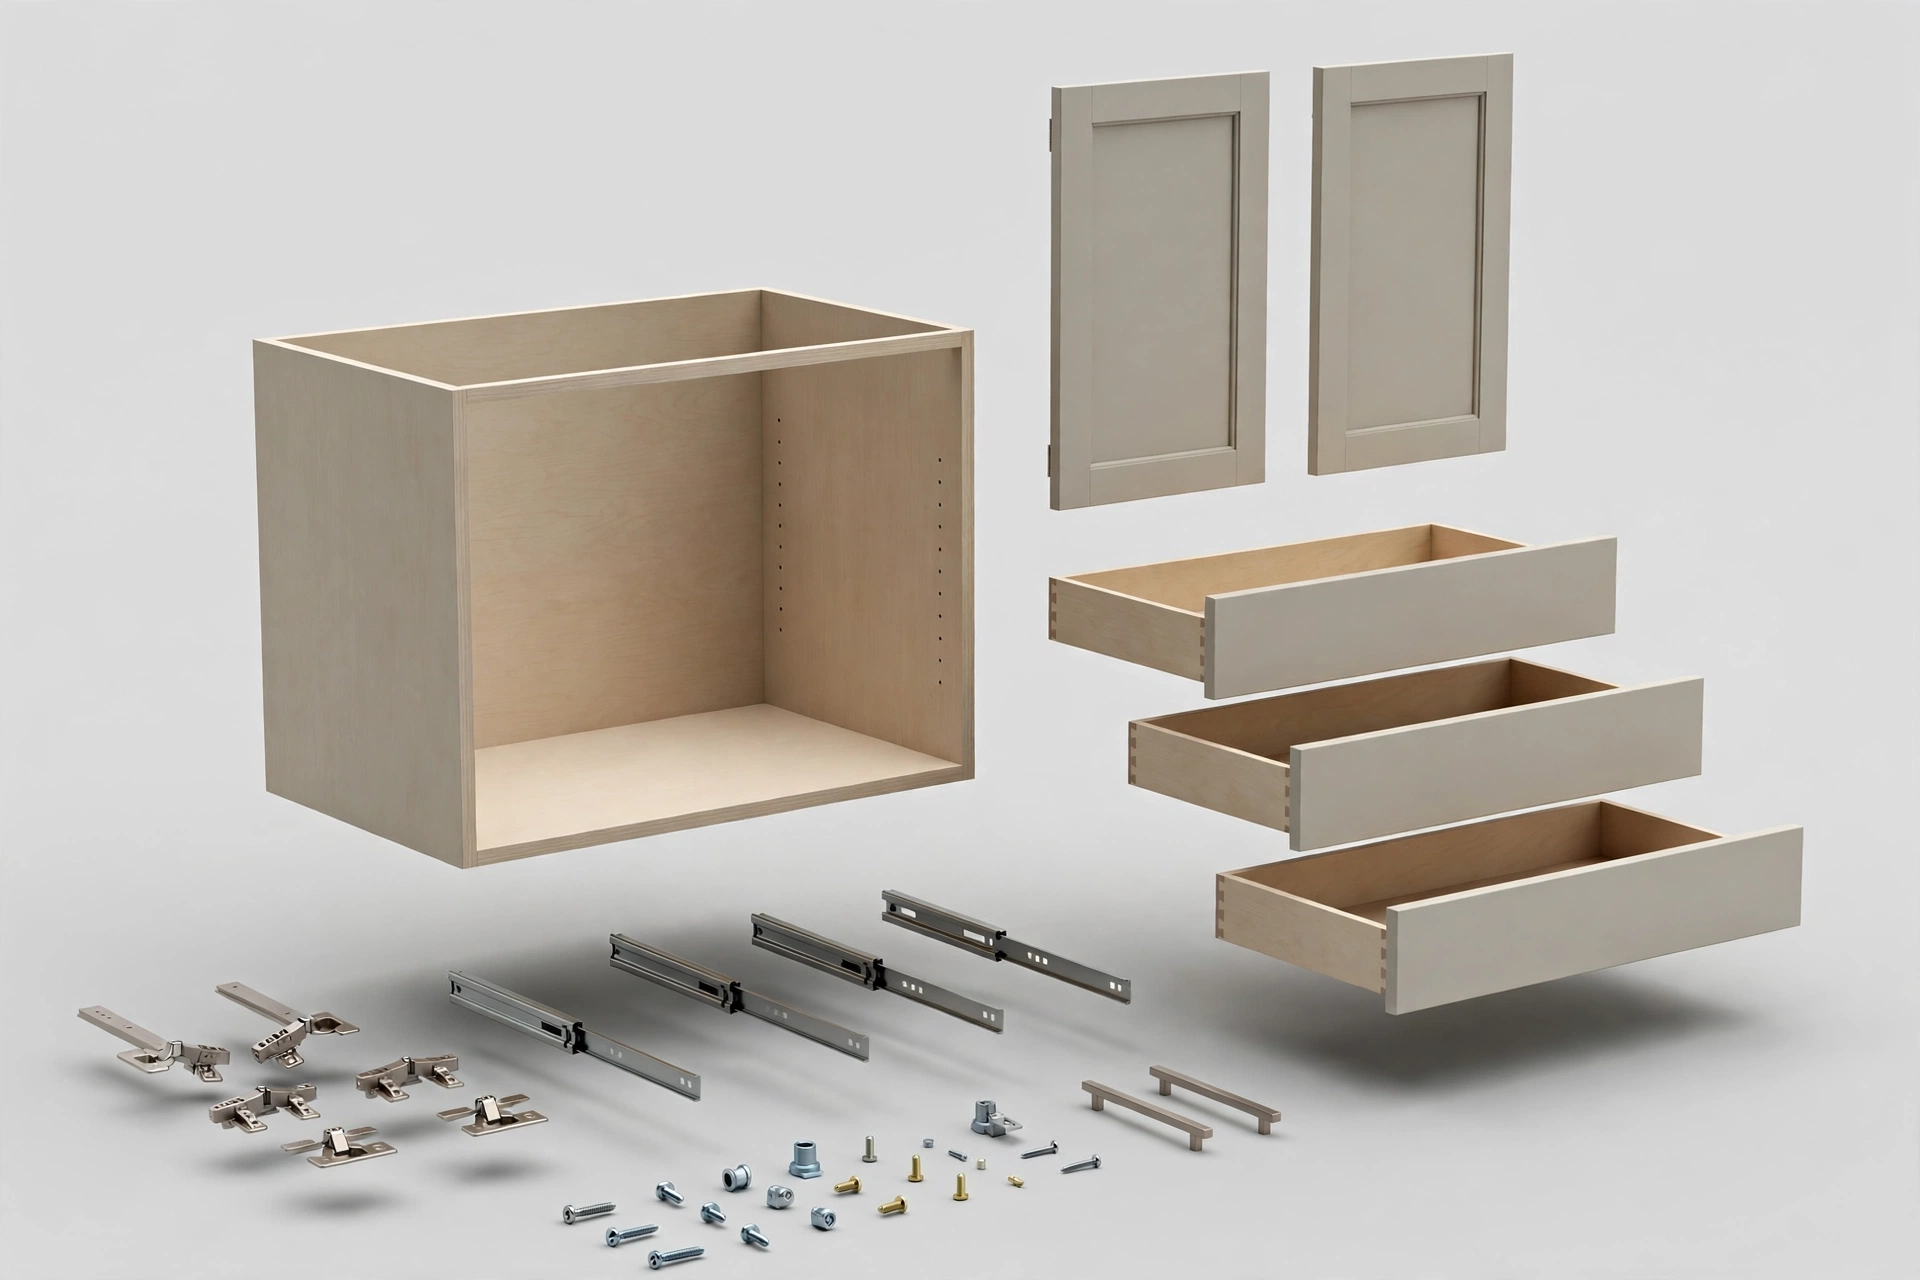
A real kitchen cabinet is a box — the carcass — with doors or drawer fronts hung on its face, and hardware fitted to both. A trustworthy model copies that anatomy exactly. Open the file and look for separate objects or clearly separated geometry for the carcass, the doors, the drawer boxes and fronts, the handles, and ideally the internal fittings such as shelves and hinge plates.
The carcass
The carcass should read as panels, not as a solid block. Look for a visible plinth or toe-kick recess at the base, side panels of plausible thickness, and an open interior when a door is removed. If the cabinet is a sealed box with a door texture painted on the front, it is a stage prop. It may render fine from one angle, but you cannot open it, reconfigure it, or show a client what is inside.
Doors, drawers and hardware
Doors and drawer fronts should be separate meshes with their own pivots or at least clean separation lines, so you can open them in a scene or swap a shaker front for a slab front. Handles matter more than beginners expect: a bar handle modelled as geometry catches light and shadow convincingly, while a handle drawn into a texture collapses the moment your camera moves close. Check that hinge and runner hardware exists where doors open — clients notice empty interiors.
Which dimensions and standards should a cabinet model follow?
It should follow the modular sizes the kitchen industry actually manufactures, because your layout, your appliances and your client’s quote all depend on them. Cabinet ranges are built on width modules, a standard worktop height and a standard depth for base and wall units. The table below lists the reference values designers plan around; use it as your measuring stick when you inspect a model’s stated dimensions.
| Element | Common standard | What to verify in the model |
|---|---|---|
| Base unit widths | 300 / 400 / 500 / 600 / 800 / 1000 mm modules | Widths land on round modules, not arbitrary sizes |
| Base unit depth | ≈ 560 mm carcass, 600 mm with worktop | Depth leaves room for the worktop overhang |
| Worktop height | ≈ 900–920 mm finished | Carcass + plinth + worktop add up to the total |
| Wall unit height | 720 mm or 900 mm typical | Top of wall units aligns across the run |
| Wall unit depth | ≈ 300–350 mm | Shallower than base units so headroom stays clear |
| Gap: worktop to wall unit | ≈ 450–600 mm | Leaves working space and room for hobs |
| Tall units | 600 mm wide, ≈ 1970–2170 mm high | Matches oven and fridge housing sizes |
Numbers vary slightly between manufacturers and markets, so treat the table as a sanity range, not law. The red flag is not a cabinet that is 10 mm off — it is a set where every unit is a different arbitrary size, because that kitchen could never be ordered, priced or built.
Why does modularity matter more than a single beautiful model?
Modularity matters because kitchens are systems, not objects. A client kitchen needs base units, drawer packs, sink and hob units, wall units, tall housings, corner solutions, end panels and filler pieces — all in one consistent style, with matching handles and finishes. A modular set gives you that family from one purchase, modelled by one hand to one standard.
Test modularity before you buy. List the units your typical project needs, then check the set against the list. Does it include a corner base solution, or will every L-shaped kitchen defeat it? Are there drawer units as well as cupboards? Can doors be mirrored for left- and right-hand runs? A set that answers yes is a design tool; a set that answers no is a single photo waiting to happen.
Which file formats should you choose?
Choose the format your own software opens natively and edits cleanly — a model you cannot modify is a model you cannot use twice. Most cabinet sets are sold in several formats, and the right pick depends on where the model will live: your design tool, your renderer, or a real-time viewer for the client.
Formats for design and rendering
Native scene files from the major 3D packages arrive with materials and object structure intact, which saves you the most time. Exchange formats such as FBX and OBJ travel between tools but may flatten object hierarchies or drop materials, so budget a few minutes per set to reorganise them. For quick client presentations, lightweight real-time formats load fast and orbit smoothly, at the cost of some material fidelity.
Before you start: what you need to evaluate a set
- Open the product page and note the stated dimensions, formats and licence type.
- Download the preview or free sample file if the seller offers one.
- Import the sample into your own software — not the seller’s viewer.
- Explode or ungroup the model and list its parts: carcass, fronts, hardware.
- Measure three units against the standards table above.
- Apply your own material to one door to test UVs and surface behaviour.
- Render one close-up of a handle and one open-door shot before you commit.
What does the licence need to cover for client work?
For client work, the licence must explicitly allow commercial use and presentation to third parties — and ideally use inside renders you sell as part of a design service. Marketplace licences differ more than designers assume. Some permit use in rendered images but not in real-time files you hand over; some restrict the number of projects; some prohibit use in work for clients altogether unless you buy an extended tier.
Read the licence before the project, not after the invoice. Keep a simple record for every set you buy: seller, date, licence tier and where the receipt lives. When a client later asks for the source files or a second project reuses the kitchen, that record answers the legal question in one minute instead of a panicked evening of searching terms pages.
How do you assemble a complete kitchen from model sets?
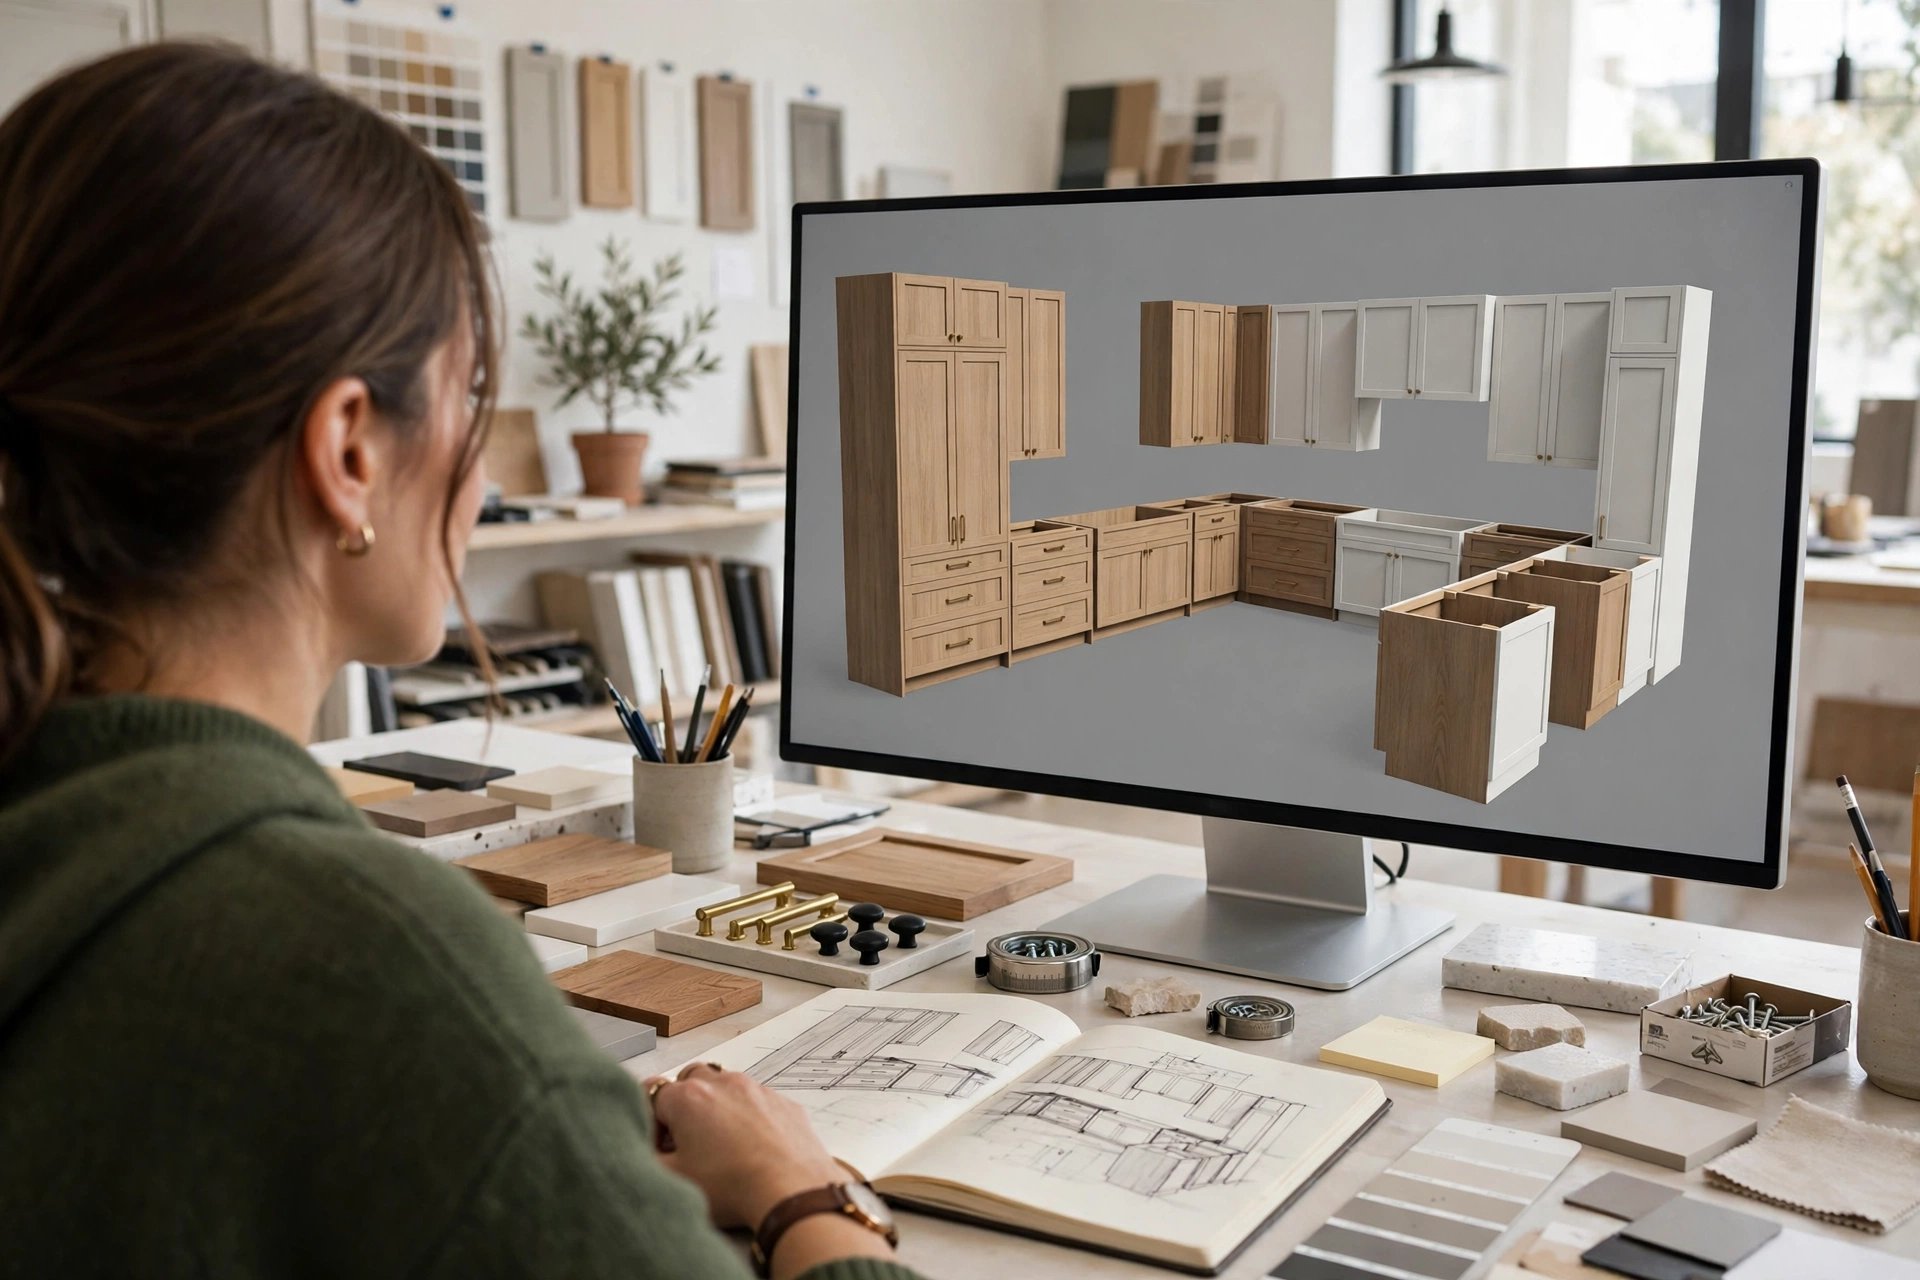
You assemble it in the same order a fitter installs it: shell, tall units, base run, wall units, then surfaces and details. Working in that order keeps the layout editable, because each layer depends on the one beneath it and nothing floats.
- Build the room shell first: walls, window and door openings, and the finished floor level.
- Place tall units — fridge housing, oven housing, larder — since they fix the kitchen’s endpoints.
- Run the base units between the tall units, keeping the sink under the window and the hob on a clear run where your design calls for them.
- Drop in appliances: hob, oven, sink and dishwasher as models or placeholders of true size.
- Add wall units above the base run, holding the standard gap from the worktop.
- Lay the worktop as one continuous surface, then add end panels, plinths and filler pieces.
- Finish with handles, lighting and styling objects — last, because they are the first things clients ask you to change.
If you also design kitchens parametrically, a dedicated studio tool such as Sketch3D-Art Studio Pro lets you generate the cabinet run itself — carcass, doors and cut list — in the same environment where you plan the room, which removes the import-and-repair step entirely for standard cabinetry. Model sets then become your styling layer rather than your structure. Comparing real manufacturer ranges — browsing a range such as IKEA’s kitchen system — is also a fast way to calibrate which unit combinations clients actually buy.
Common mistakes
Buying the render, not the model. A beautiful product image can hide a merged, uneditable mesh. Always judge the wireframe, the part list and the stated dimensions — never the hero shot alone.
Ignoring scale until layout day. A cabinet modelled 15% oversize looks fine alone and destroys a floor plan. Measure the first unit you import, every time, before it multiplies across a run.
Mixing sets with different construction logic. Two sets may share a colour and still clash: different plinth heights, door gaps and handle positions read as errors at render distance. Commit to one family per kitchen.
Skipping the licence check. Presenting a client render built on a personal-use licence is a business risk, not a technicality. Verify commercial and client use before the set enters your library.
Modelling every interior. Fully fitted interiors in every unit double your scene weight for shots nobody requested. Keep one or two hero units detailed; let closed doors stay closed elsewhere.
Frequently asked questions
Can I use kitchen cabinet 3d models in renders I charge clients for?
Usually yes, but only under a licence that allows commercial use — check the tier you bought. Most professional marketplace licences cover rendered images for clients; handing over editable source files is the part most often restricted.
What is the most important dimension to check first?
Check the base unit width module and the total worktop height. If widths land on standard modules and the finished height sits around 900–920 mm, the set almost certainly follows real construction logic throughout.
Should doors and drawers be separate objects?
Yes — separate fronts are what let you open units, swap styles and show storage in a presentation. A cabinet whose front is one textured plane cannot do any of that, so treat merged fronts as a deal-breaker for design work.
How many units should a good starter set include?
Enough to build a straight run and an L-shape: several base widths, a drawer pack, sink and hob units, wall units in two heights, a tall housing and corner and filler pieces. Count coverage of your typical layout, not the raw object total.
Do I need high-poly cabinet models?
Rarely. Cabinets are boxes with flat or profiled fronts, so clean mid-poly geometry with good materials renders better and orbits faster than dense meshes. Save polygon budgets for handles, taps and the objects the camera approaches.
Keep learning: model sets are only half the job — the layout rules in our small kitchen cabinet design guide show where those units should actually go, and our furniture cut list guide turns the finished design into a priced parts list.
Conclusion
You now have a complete audit for kitchen cabinet 3d models: construction that mirrors a real carcass, dimensions that respect industry modules, a modular family that covers a whole kitchen, a format your tools open cleanly, and a licence that survives client work. Run the seven evaluation steps on one sample file and you will know within minutes whether a set deserves a place in your library. Your next step: take the next kitchen on your desk and lay it out with the assembly order above — shell, tall units, base run, wall units, details — and notice how much less rework the layout needs. Which check has caught the worst model in your own library so far?




 English
 العربية
 Français