

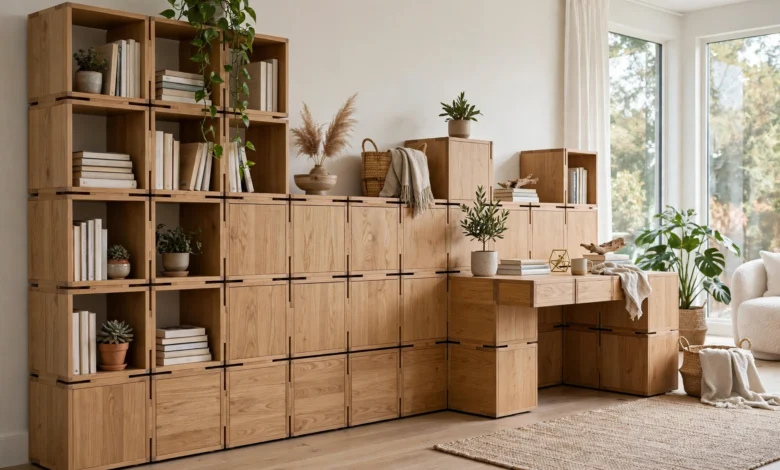
Modular furniture design means building every piece from a shared kit of parts — standard panels, connectors and dimensions — so one design effort produces a whole family of furniture that can be rearranged, extended and repaired for years. Instead of designing a shelf, a cabinet and a desk as three separate projects, you design the system once and configure the pieces forever. This guide teaches you the grid logic, connector standards and tolerance rules that make a modular system actually work in the workshop and in the home.
Key takeaways
- Build the whole system on one base module — a fixed grid unit that every panel, shelf and door dimension divides into cleanly.
- Standardise your connectors early: one or two joining methods across the entire family keeps assembly fast and mistakes rare.
- Design a starter family — shelf, cabinet and desk — that shares sides, shelves and hardware so parts stay interchangeable.
- Leave deliberate tolerance for repeated assembly; joints that are perfect on day one loosen after the fifth rebuild if you design to zero clearance.
- Choose modular when the user will reconfigure, move or extend the furniture; choose bespoke when the piece must fit one fixed space perfectly.
What is modular furniture design, exactly?
Modular furniture design is a method where furniture is planned as a system of interchangeable components rather than as standalone objects. A module is a repeatable unit — of width, depth, height or all three — and every part you design is a multiple or a clean fraction of that unit. Because the parts share dimensions and connection points, they combine into many configurations without new design work.
Think of it as designing the alphabet instead of writing one word. A well-planned system lets a customer start with a low bookcase, add a cabinet module next year, and stack a desk surface across both the year after. Your job as the designer is to make those future combinations possible today, by controlling the grid, the joints and the hardware from the very first sketch.

Step 1: Choose your base module and grid
Every successful system starts with one number: the base module. Pick a unit that suits the furniture type — many cabinet and shelving systems work well on a unit in the 50–100 mm range for fine adjustments, with overall widths built from larger blocks. What matters is not the exact number but consistency: every external dimension and every hole position should relate to it.
How to set the grid in practice
- Measure the spaces your furniture must serve — alcove widths, ceiling heights, door swings — and note the tightest constraint.
- Choose a base unit that divides those constraints with minimal leftover space.
- Fix your standard depths first, because depth changes are the hardest to combine across pieces.
- Define standard heights for plinths, worktops and shelf spacing so modules stack and align.
- Write the grid down as a one-page reference sheet and design nothing outside it.
Test the grid on paper against three real rooms before you cut anything. If the grid leaves awkward gaps in all three, adjust the unit now — changing it later means redesigning every part. Designers who model parametrically can test this quickly: in a tool such as Sketch3D-Art Studio Pro, you can resize a unit across the grid and watch the cut list update, which makes grid experiments cheap.
Step 2: Standardise your connectors
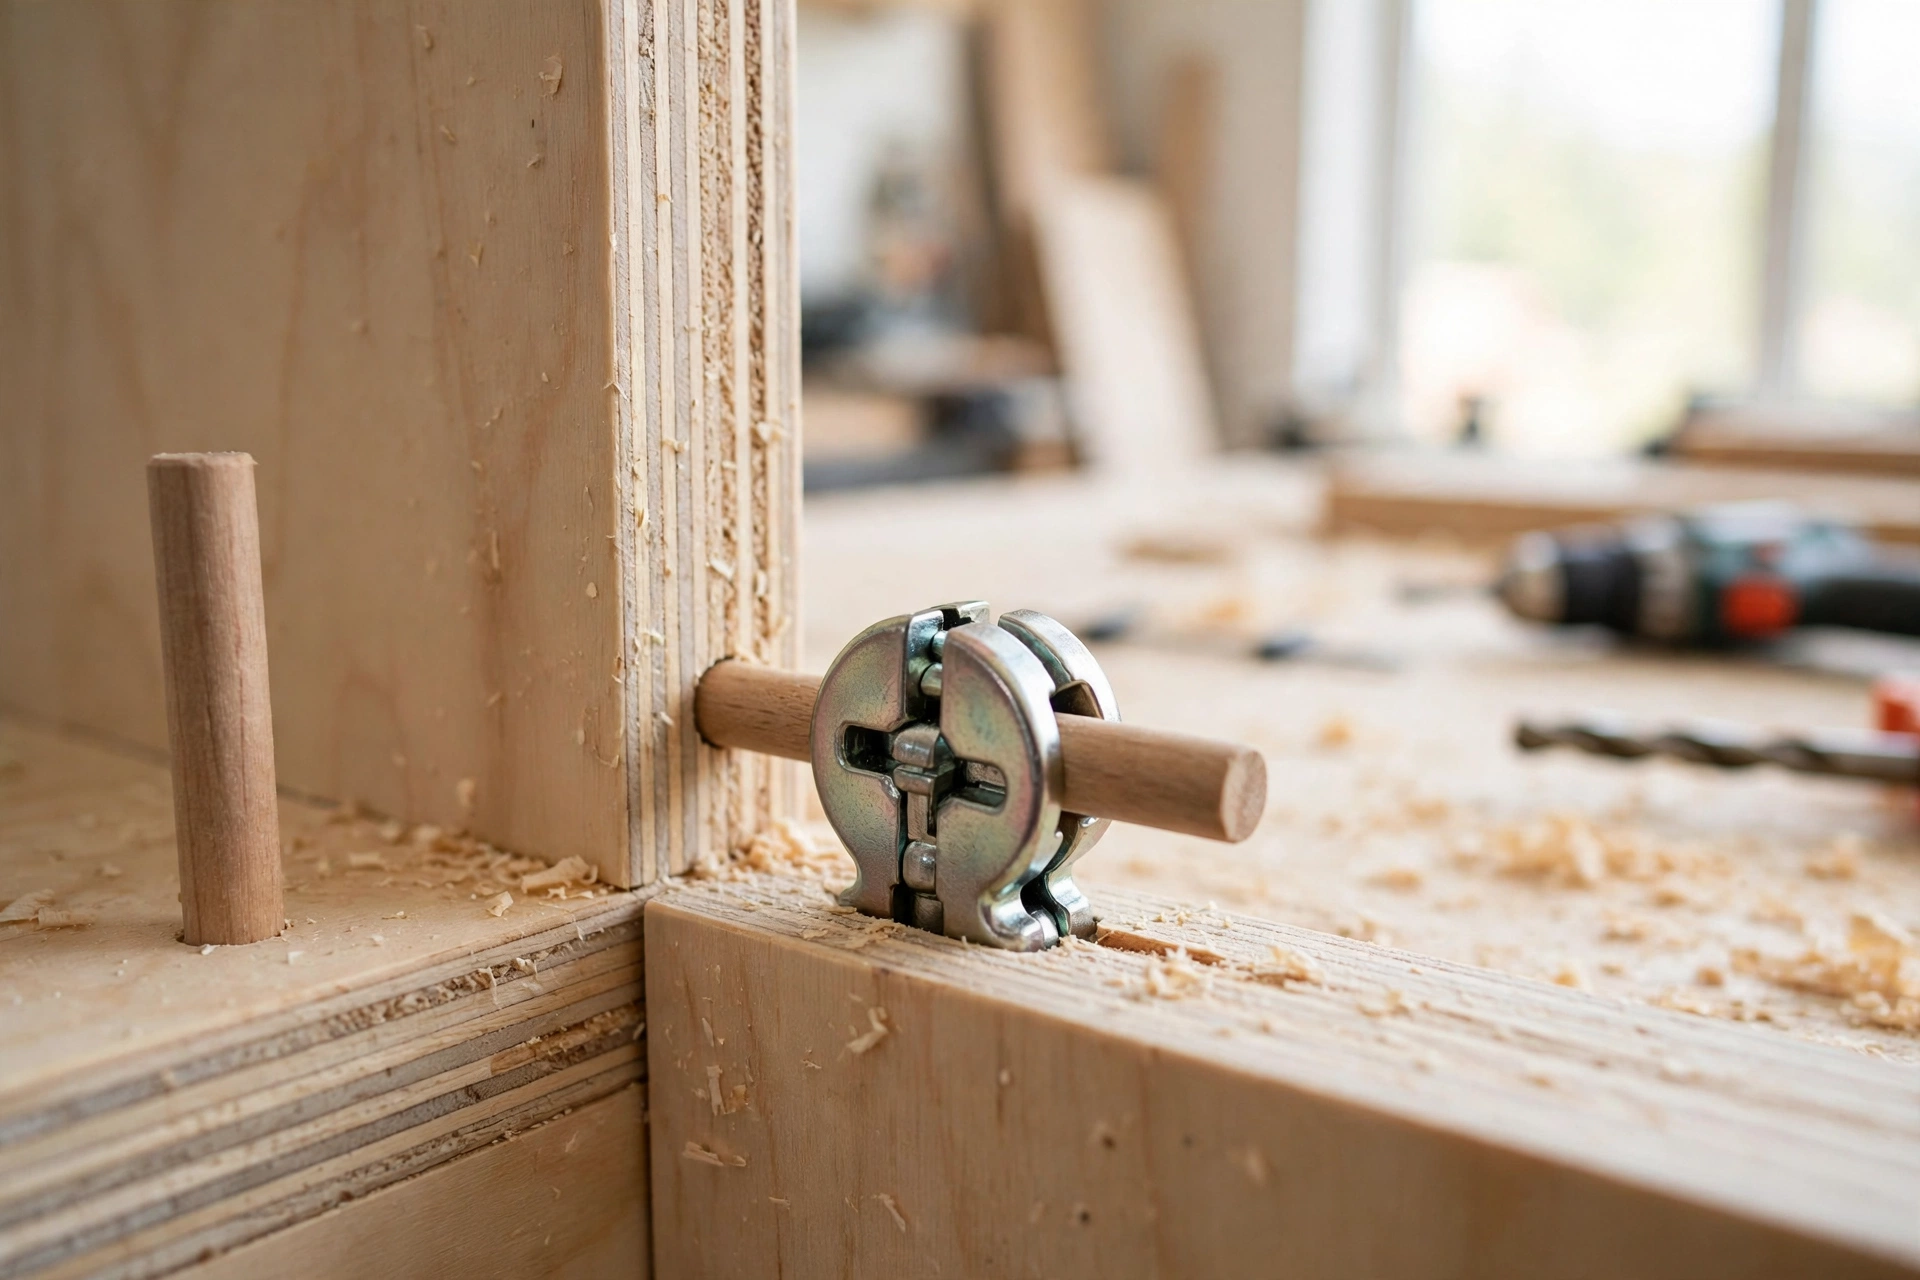
Connectors are where modular systems succeed or fail. Each joint must be strong, reversible and forgiving, because users will assemble and disassemble it many times. Limit yourself to one primary structural connector and one secondary connector for panels at right angles, and use them everywhere.
What makes a good modular connector?
A good modular connector locates parts precisely, tightens with a common tool, tolerates small errors and survives repeated cycles without stripping. Cam-and-dowel fittings, threaded inserts with bolts, and slotted tab systems all qualify when used consistently. What disqualifies a connector is variety: five different fittings in one system means five chances for the user to pick the wrong one.
Position matters as much as type. Place connection points on the grid — for example at fixed distances from panel edges — so any two parts that meet share the same hole pattern. When hole patterns repeat, a side panel from the desk fits the cabinet, and a spare shelf fits both. That repetition is the entire economic argument for modular design: fewer unique parts, cheaper production, easier repairs.
Step 3: Design a starter family that shares parts
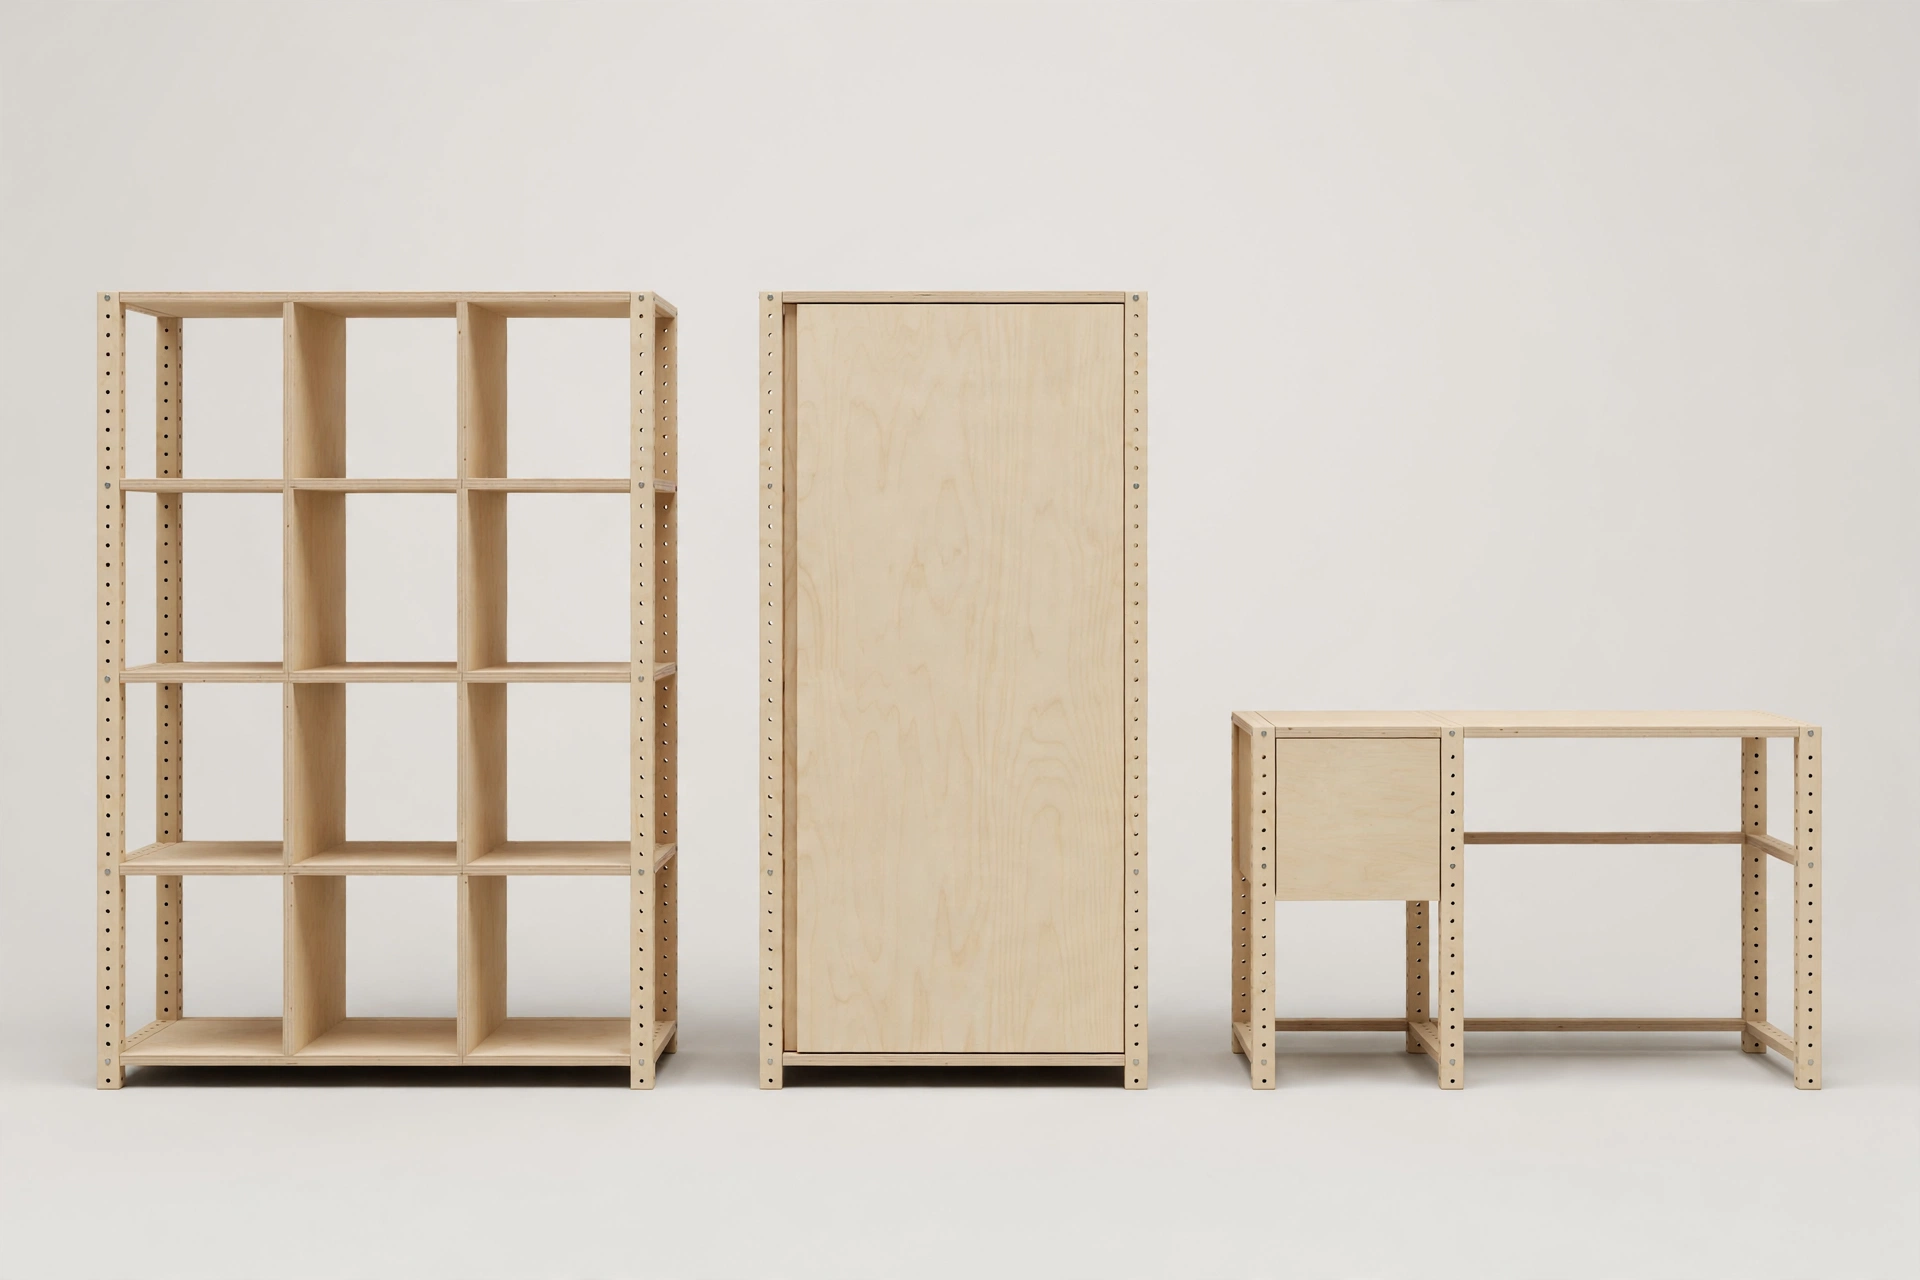
Do not launch a system with twenty modules. Launch with three pieces that prove the system: an open shelf unit, a closed cabinet and a desk. Design them together, on the same drawing, so they share side panels, shelf boards, plinths and hardware wherever possible.
A starter family, part by part
Start with the shelf unit, because it defines your uprights and shelf spacing. Give the cabinet the same external width and depth, and reuse the shelf unit’s side panels, adding only doors and a back. Then design the desk to span the same modules: its top rests at the standard worktop height your grid already defines, and its legs or support panels match the cabinet’s sides.
Count your unique parts when you finish. A tight starter family often needs surprisingly few: two side-panel sizes, one shelf size, one door size, one top, plus hardware. Every shared part is a part you stock once, cut with one setup and replace easily. If a part serves only one piece, ask whether the grid can absorb it before you accept it into the system.
| Part | Shelf unit | Cabinet | Desk |
|---|---|---|---|
| Side panel (standard) | 2 | 2 | 1–2 as supports |
| Shelf board | 3–4 | 1–2 | — |
| Door | — | 1–2 | — |
| Worktop / top panel | 1 (top) | 1 (top) | 1 |
| Plinth | 1 | 1 | Optional |
| Back panel | Optional | 1 | — |
Notice how the desk reuses the system’s top and supports instead of inventing new ones. That is the pattern to protect as the family grows: new modules should mostly be new combinations, not new parts. When you model the family in 3D before building, check each new module against the shared-parts table and reject designs that quietly introduce one-off components.
Step 4: Design tolerance for repeated assembly
A bespoke joint is assembled once; a modular joint may be assembled twenty times. Design for the twentieth assembly, not the first. Wood-based panels swell and shrink slightly with humidity, screw holes elongate, and cam fittings lose bite if they are forced into misaligned holes.
How much clearance should you leave?
Leave a small, deliberate clearance in locating features — enough that parts slide together by hand without force, typically a fraction of a millimetre on dowel and slot fits. Rely on the connector, not friction, for strength: the dowel locates, the bolt or cam clamps. If a joint needs a mallet on day one, it will be loose or split by the third move.
Also design for the user’s errors. Make asymmetric parts impossible to fit backwards by offsetting one hole, and choose hardware that can be replaced from the front without dismantling the whole unit. Finally, assemble and disassemble your prototype at least five times during development, measuring wobble after each cycle. If play increases noticeably, change the connector or add a locating feature before the design ships. Our guide to prototyping 3D designs walks through this test-build discipline in more depth.
When does modular lose to bespoke?
Modular loses when the space is fixed and unforgiving: a sloped attic ceiling, a chimney breast, a wall that is 40 mm too short for the next module. A bespoke piece absorbs those irregularities; a modular system exposes them as gaps. Modular also loses when the user will never reconfigure — a fitted wardrobe in a forever home gains little from reversible joints and pays for them in cost and slight visual repetition.
Choose modular when life is in motion: renters, growing families, home offices that become nurseries, and small homes where one wall must serve three purposes. In those cases the system’s flexibility outweighs its compromises. Many designers blend both approaches — a modular core with one bespoke filler piece that closes the final gap — and that hybrid is often the most professional answer. Large retailers built empires on this logic; browsing a system range such as IKEA shows how far a disciplined grid and a small parts count can scale.
Common mistakes
The most common mistake is designing pieces first and calling them a system afterwards. If the shelf and cabinet were designed independently, their dimensions will almost meet — and “almost” is fatal to interchangeability. Design the grid first, then the pieces, in that order, every time.
Second, designers overload the system with options: four depths, six widths, three heights. Each option multiplies combinations but also multiplies stock, instructions and user confusion. Add options only when a real configuration demands them. Third, they forget the instructions. A modular system is a product the user assembles repeatedly, so photograph each step during your prototype build and write the manual while your own mistakes are fresh.
Finally, many systems fail at the spare-parts stage. If a customer cannot buy one replacement shelf in five years, the system promise is broken. Keep the parts list stable, publish it, and design new modules to respect it — a lesson visible in the long-lived ranges in our round-up of interior design examples and trending styles, where adaptable furniture outlasts fixed statement pieces.
Frequently asked questions
What base module size should I choose?
Choose a unit that divides your target room dimensions and furniture sizes with minimal waste, and fix depths before widths. There is no universal number; consistency matters more than the figure itself. Test the grid against three real rooms before committing.
How many unique parts should a starter system have?
As few as you can manage — a shelf, cabinet and desk family can often share panels, shelves and hardware down to a handful of unique parts. Audit every part and challenge any that serve only one piece. Fewer parts means cheaper production and easier spares.
Are modular joints as strong as glued bespoke joints?
A well-chosen mechanical connector is strong enough for domestic furniture and has the advantage of being reversible. Strength comes from correct connector choice and placement on the grid, not from glue. Prototype and cycle-test the joint before you trust it.
Can I add new modules to an existing system later?
Yes, provided the new module respects the original grid, connector standard and hole patterns. That discipline is exactly what makes a system a system. Document your grid and parts list so future designs — yours or a colleague’s — can extend it safely.
Is modular design more expensive to produce?
The first design takes longer because you design the system, not a piece. Production then gets cheaper per configuration, because parts repeat and setups are shared. The economics favour modular work whenever more than a few configurations will actually be built.
Conclusion
Modular furniture design rewards patience at the start: fix the grid, standardise the connectors, prove the system with a three-piece family, and build in tolerance for a lifetime of rebuilding. Do that, and every later module is a configuration exercise instead of a new design project. Your next step is simple — pick one furniture type you build often, define its base module on a single page, and redesign its two most common pieces to share parts. Which piece in your workshop would benefit most from becoming a system?



 English
 العربية
 Français