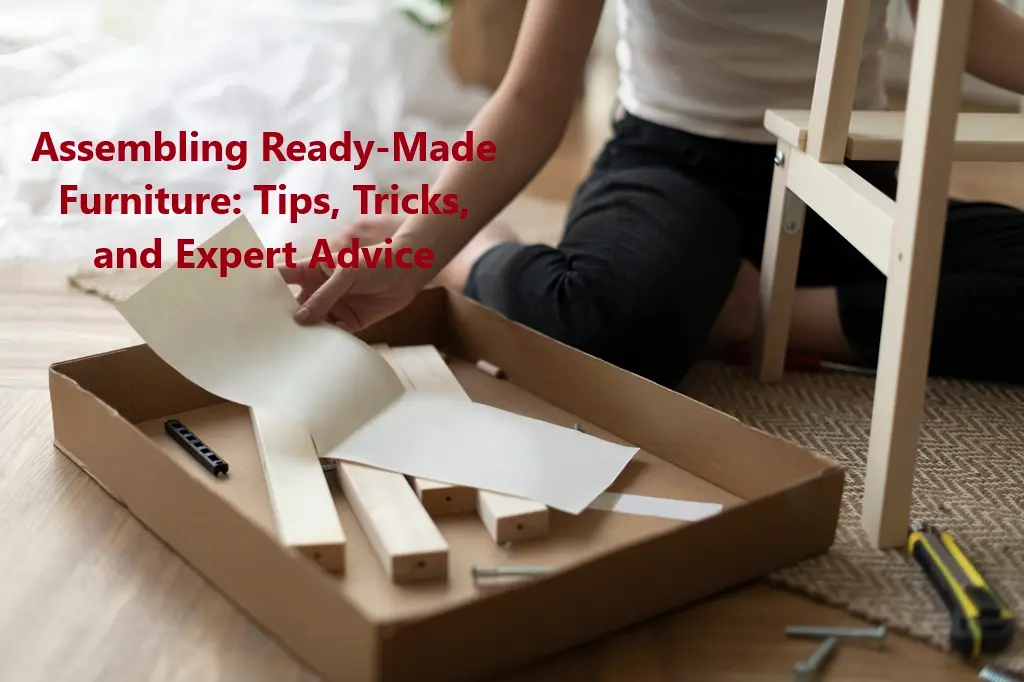
Assembling Ready-Made Furniture: Top Tips, Tricks, and Expert Advice
Introduction
Ready-made furniture, also known as Ready-To-Assemble (RTA) or flat-pack furniture, has revolutionized the way we furnish our homes. These budget-friendly alternatives to fully assembled pieces come neatly packaged in compact boxes, requiring assembly by the purchaser. While the prospect of assembling ready-made furniture might seem daunting at first, with the right knowledge and tools, you can transform those flat packages into beautiful, functional pieces for your home.
The popularity of RTA furniture continues to grow for a good reason. Compared to fully assembled furniture, RTA options offer several distinct advantages: they’re typically more affordable, easier to transport, and provide the satisfaction of building something with your own hands. However, these benefits come with trade-offs, including the time investment required for assembly, potential quality concerns if not properly constructed, and occasionally missing or damaged parts.
The key to maximizing the lifespan and durability of your ready-made furniture lies in proper assembly. A poorly assembled bookcase or wobbly table isn’t just an eyesore—it can be a safety hazard. Taking the time to assemble your furniture correctly ensures stability, functionality, and longevity.
In this comprehensive guide, we’ll walk you through everything you need to know about furniture assembly, from essential tools and preparation steps to detailed assembly instructions and troubleshooting tips. Whether you’re a DIY furniture assembly novice or looking to refine your skills, this guide will help you tackle your next furniture project with confidence.


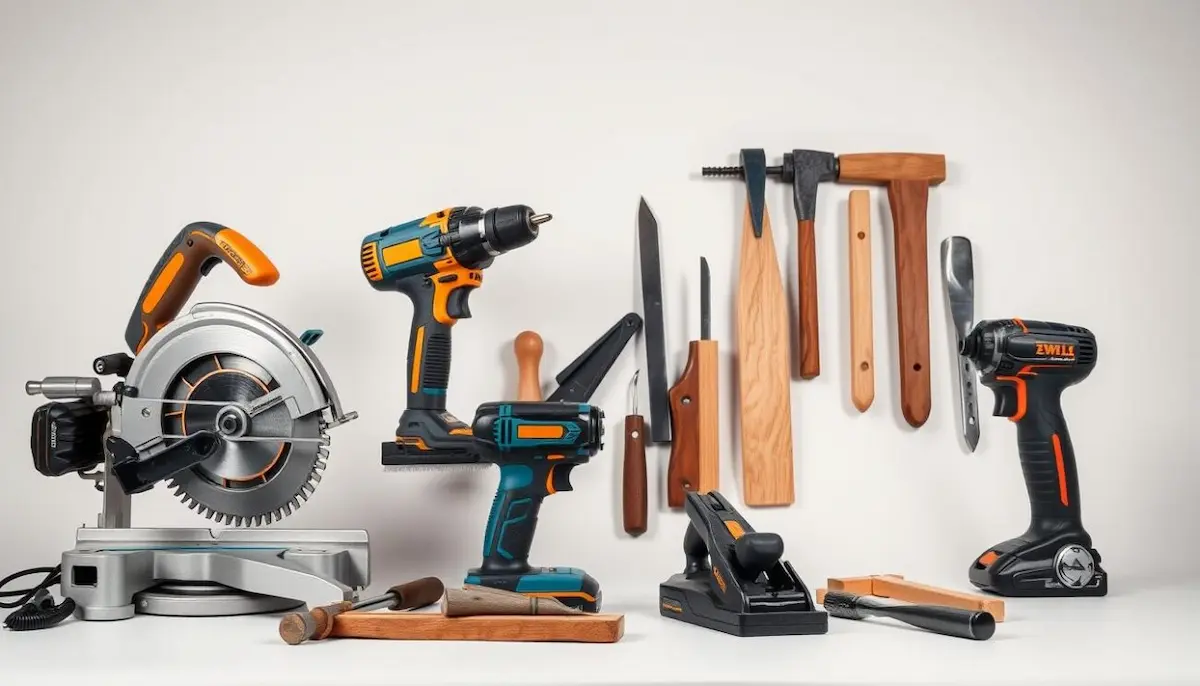
Essential Tools and Materials
Having the right tools on hand before beginning your furniture assembly project can make the difference between a smooth, enjoyable experience and a frustrating ordeal. Here’s a detailed list of tools you’ll want to have ready:
Must-Have Tools
- Screwdrivers: A set of Phillips and flathead screwdrivers in various sizes. Consider investing in a multi-bit screwdriver like the Klein Tools 32500 11-in-1 Multi-Bit Screwdriver for versatility.
- Allen Wrenches (Hex Keys): Most RTA furniture uses hex bolts. While manufacturers typically include the necessary Allen wrench, having a quality set like the TEKTON 25282 26-piece Long Arm Ball End Hex Key Wrench Set ensures better leverage and easier assembly.
- Rubber Mallet: Perfect for gently tapping pieces together without damaging surfaces. The TEKTON 30603 Double-Faced Soft Mallet is a great choice.
- Level: Essential for ensuring your furniture sits evenly. The Stanley 42-324 24-Inch Level provides accuracy in a durable package.
- Measuring Tape: For confirming dimensions and placement. The Stanley 33-425 25-Foot PowerLock Tape Measure is reliable and easy to use.

Additional Helpful Tools
- Power Drill with Screwdriver Bits: While optional, a power drill significantly speeds up assembly. The BLACK+DECKER 20V MAX Cordless Drill offers good value for occasional use.
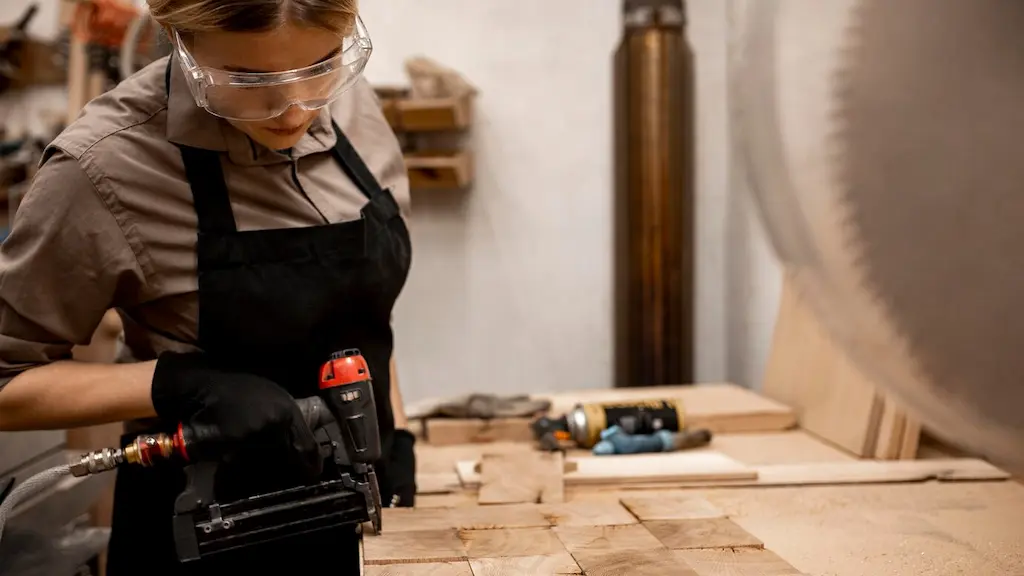
- Work Gloves: Protects your hands from splinters and sharp edges.
- Utility Knife: For opening packaging and cutting zip ties.
- Furniture Sliders: Make positioning heavy pieces easier without damaging floors.
Materials Checklist
Beyond the tools included with your furniture, you may want to have these additional materials on hand:
- Wood Glue: For reinforcing joints (Titebond II Premium Wood Glue is excellent).
- Extra Screws and Bolts: Having spares of common sizes can save you a trip to the hardware store.
- Furniture Felt Pads: Protects your floors from scratches.
- Touch-Up Markers: To cover minor scratches in matching wood tones.
- Furniture Polish: For the finishing touch once assembly is complete.
Each tool serves a specific purpose in the furniture assembly process. Quality tools make the work easier and help prevent damage to your new furniture. While it might be tempting to use makeshift tools (like using a butter knife as a screwdriver), proper tools reduce the risk of stripped screws, damaged furniture, and personal injury.
Before beginning any DIY furniture assembly project, take inventory of these tools and materials. Being prepared saves time and frustration later.
Preparation is Key
The groundwork you lay before picking up a single screw can determine the success of your furniture assembly project. Proper preparation not only streamlines the assembly process but also helps prevent mistakes that could compromise the stability and appearance of your furniture.
Read the Instructions Thoroughly
This might seem obvious, but it’s a step many people skip to their detriment. Before touching any components:
- Read the entire instruction manual from beginning to end
- Pay attention to any warnings or special notes
- Understand the overall assembly sequence
- Identify any steps that might require assistance
- Look for QR codes that might link to helpful video tutorials
Many manufacturers now provide online resources in addition to printed instructions. If the included guide is unclear or damaged, check the company’s website for digital versions or assembly videos.
Inventory All Parts
Missing or damaged components can halt your progress and lead to frustration. To avoid this:
- Empty all packaging completely
- Count and verify each part against the inventory list
- Organize hardware (screws, bolts, dowels, etc.) by type and size
- Keep small hardware in labeled containers or sandwich bags
- Check for any damaged components that might need replacement
If you discover missing or damaged parts, contact the manufacturer immediately. Most reputable companies will ship replacement parts quickly, often at no additional cost.
Create an Organized Workspace
Your assembly environment significantly impacts your experience:
- Clear a space larger than the finished furniture dimensions
- Ensure good lighting (a headlamp can be helpful for dark cabinet interiors)
- Work on a clean, flat surface
- Have a power outlet nearby if using electric tools
- Remove pets and small children from the area for safety
For larger pieces like beds or wardrobes, assemble them in the room where they’ll ultimately reside to avoid doorway clearance issues.
Protect Your Floors
The assembly process can easily damage flooring:
- Lay down a blanket, drop cloth, or cardboard to work on
- Use the furniture’s packaging materials as a protective layer
- Consider foam interlocking mats for more substantial protection
- Keep furniture sliders nearby for repositioning heavy pieces
Identify Parts and Hardware
Before starting assembly:
- Lay out all parts according to the diagram in the instructions
- Group similar components together
- Familiarize yourself with different screw and bolt types
- Note any directional markers on parts (often indicated by stickers or arrows)
- Pre-sort hardware by assembly step if the instructions are organized that way
Many experienced furniture assemblers take photos of all components before beginning, creating a visual reference that can be helpful if pieces get mixed up during assembly.
This preparation phase, while sometimes overlooked in the excitement of completing your new furniture, establishes the foundation for successful DIY furniture assembly. Taking the time to prepare properly saves time overall and reduces the likelihood of errors that could affect the structural integrity of your finished piece.
Step-by-Step Assembly Process (General)
While specific furniture assembly instructions vary by product, most ready-made furniture follows a similar assembly sequence. This general guide applies to many common pieces like bookcases, tables, beds, and cabinets.
1. Lay Out All Parts
- Position all wooden/metal components on your protected work surface
- Arrange them logically, with similar pieces grouped together
- Orient them according to their final assembly position
- Reference the manufacturer’s diagrams to confirm the correct placement
Pro Tip: Take a photo of the laid-out parts to reference later if needed.
2. Identify Hardware
- Separate and identify all hardware components
- Match screws, bolts, dowels, and other fasteners to the hardware list
- Understand the purpose of each type of hardware
- Organize small parts in containers by type or by assembly step
Hardware Guide:
| Hardware Type | Common Use | Assembly Tip |
|---|---|---|
| Wood Screws | Direct wood-to-wood connections | Pre-drill to prevent splitting |
| Cam Locks & Bolts | Hidden connections in shelving | Insert bolts first, then connect with cam locks |
| Dowels | Alignment and reinforcement | Confirmation Screws |
| Confirmat Screws | Strong panel connections | Requires pilot hole |
| Shelf Pins | Adjustable shelving | Install uniformly for level shelves |
3. Assemble the Frame
- Begin with the main structural elements
- Follow the sequence specified in your instructions
- Typically starts with side panels or legs
- Hand-tighten fasteners initially to allow adjustments
- Ensure right angles where needed using a carpenter’s square
Pro Tip: For larger pieces, having a helper hold components in place makes this step much easier.
4. Attach Panels and Supports
- Add shelves, dividers, or table surfaces
- Install backs (usually with small nails or screws)
- Insert drawer rails or door hinges
- Ensure all supports are level and properly aligned
- Check for squareness throughout this process
Important: Back panels often provide critical structural support. Don’t skip attaching them properly.
5. Install Drawers and Doors
- Assemble drawers according to instructions
- Attach drawer slides to both the cabinet and drawers
- Mount door hinges and attach doors
- Make initial adjustments to ensure proper operation
- Test the motion of all moving parts
Adjustment Tip: Most modern hinges have multiple adjustment screws for perfect door alignment. Look for small screws that adjust height, depth, and side-to-side positioning.
6. Tighten All Screws and Bolts
- Once assembly is complete and everything is aligned, go back and fully tighten all connections
- Be careful not to over-tighten, which can strip screws or split wood
- Confirm that cam locks are fully engaged (usually indicated by an arrow pointing toward the edge)
- Check that all panels are flush and gaps are minimized
7. Test for Stability
- Gently rock the furniture to test the stability
- Check that all drawers and doors open and close smoothly
- Ensure the piece sits level on your floor
- Make any final adjustments needed
Safety Note: For tall furniture like bookcases, dressers, or wardrobes, install the included anti-tip kit to secure the piece to the wall, preventing dangerous tip-over accidents.
During each step, refer back to your instructions and diagrams. Skipping ahead or taking shortcuts during furniture assembly often leads to problems that require disassembly and rework. Taking your time and following the proper sequence results in a sturdier, longer-lasting piece of furniture.
Remember that DIY furniture assembly is not a race. If you encounter confusion or resistance during assembly, stop and reassess rather than force components together, which can cause damage.
Troubleshooting Common Assembly Problems
Even with careful preparation and attention to detail, issues can arise during furniture assembly. Here’s how to address common problems:
Stripped Screws
Signs:
- The screwdriver slips when turning
- The screw spins but doesn’t tighten
- Visible damage to the screw head
Solutions:
- Use a rubber band: Place a rubber band between the screwdriver and the stripped screw head to provide extra grip
- Try pliers: If the screw head protrudes enough, grip it with needle-nose pliers
- Use a screw extractor: For severely stripped screws, a dedicated extractor tool may be necessary
- Replace the screw: Often the simplest solution if you have spares
Prevention:
- Use the correct size screwdriver
- Apply downward pressure while turning
- Don’t over-tighten
- Pre-drill pilot holes when driving screws into wood
Misaligned Parts
Signs:
- Holes don’t line up
- Panels sit unevenly
- Visible gaps between components
Solutions:
- Loosen all fasteners: Back out screws and bolts to allow repositioning
- Check for correct orientation: Ensure all parts are facing the right direction
- Look for debris: Remove anything blocking proper fit
- Use clamps: Hold parts in alignment while fastening
- Check for warped materials: Sometimes slight warping requires gentle force or a shim
Prevention:
- Follow the assembly sequence exactly
- Verify part orientation before fastening
- Keep fasteners loose until all components are in place
Missing Hardware
Signs:
- The hardware count doesn’t match the inventory list
- Unable to complete assembly due to missing fasteners
Solutions:
- Recheck packaging: Thoroughly search all packaging materials
- Contact manufacturer: Most companies will ship replacement parts
- Find suitable substitutes: Hardware stores can help identify equivalent fasteners
- Temporary alternatives: Use similar-sized screws from your supply until replacements arrive
Prevention:
- Inventory all hardware immediately upon opening
- Contact the manufacturer promptly if parts are missing
Broken Parts
Signs:
- Visible cracks, chips, or breaks
- Parts that don’t fit despite correct orientation
Solutions:
- Assess repairability: Minor damage might be fixable with wood glue
- Contact manufacturer: For significantly damaged parts, request replacements
- Document damage: Take photos for warranty claims
- Return policy: If the assembly hasn’t progressed far, consider returning the entire unit
Prevention:
- Inspect all parts before assembly begins
- Handle components carefully during unpacking and assembly
Wobbly Furniture
Signs:
- Piece rocks or shifts when moved
- Uneven legs or supports
- Overall instability
Solutions:
- Check floor levelness: Use shims under legs for uneven floors
- Tighten all fasteners: Loose connections are a common cause of wobbling
- Reinforce joints: Add wood glue to joints (if disassembly is possible)
- Add brackets: L-brackets can reinforce weak corners
- Check for damaged components: Replace any compromised structural elements
Prevention:
- Follow torque recommendations for tightening
- Don’t skip any fasteners
- Ensure the piece is assembled on a flat surface
When troubleshooting problems during furniture assembly, patience is essential. Forcing components or overtightening to compensate for misalignment often makes the problem worse. Taking the time to identify the root cause of the issue leads to better, more permanent solutions.
Remember that many manufacturers have dedicated customer service teams to help with assembly problems. Don’t hesitate to reach out if you encounter issues that you can’t resolve on your own.
Advanced Tips and Tricks
Once you’ve mastered the basics of furniture assembly, these advanced techniques can elevate your results from functional to professional quality:
Using Wood Glue for Added Stability
While not always mentioned in assembly instructions, applying a small amount of wood glue to joints can significantly improve durability:
- Where to use: Apply to dowel joints, tenons, and edge-to-edge panel connections
- How much: A thin, even layer is sufficient—excess glue will squeeze out and require cleanup
- Timing: Apply glue just before joining pieces; wipe away excess immediately with a damp cloth
- Curing: Allow 24 hours for full strength before heavy use
Expert Tip: For maximum strength, use Type II PVA wood glue like Titebond II, which offers water resistance and strong bonding properties.
Pre-drilling Pilot Holes to Prevent Splitting
When adding screws to solid wood components:
- Drill bit size: Use a bit slightly smaller than the screw’s inner shaft (not including threads)
- Depth: Drill approximately 2/3 the length of the screw
- Technique: Keep the drill perpendicular to the surface for straight, properly aligned holes
- Material considerations: Hardwoods especially benefit from pilot holes to prevent splitting
When to pre-drill: Always pre-drill when working near edges, in thin material, or with hardwoods. It’s less critical in the center of softwood or engineered wood panels.
Using a Power Drill (With Caution)
A power drill can save time but requires careful handling:
- Torque settings: Start with low torque settings (1-3) for furniture assembly
- Speed control: Use variable speed control, starting slowly
- Clutch adjustment: Set the clutch to disengage before stripping screws or damaging materials
- Bit selection: Use high-quality bits that fit fasteners precisely
- Technique: Apply steady pressure while maintaining control
Warning: Never use impact drivers for furniture assembly—they deliver too much torque and can damage furniture components.
Properly Tightening Screws and Bolts
Finding the right balance is crucial:
- Gradual approach: Tighten in stages, working around the piece rather than fully tightening one area first
- Cam lock tightening: Turn clockwise until the arrow points to the edge or toward the matching bolt
- Feel the resistance: Learn to recognize when fasteners are properly seated
- Final check: After completing assembly, make one final check of all fasteners
Over-tightening risks: Stripped threads, crushed wood fibers, split panels, and stressed joints that may fail later.
Hiding Unsightly Screw Holes
For a professional finish:
- Wood plugs: Purchase or make wooden plugs that match your furniture’s color and grain
- Wax pencils: Fill small holes with furniture wax pencils in matching colors
- Wood filler: For larger gaps, use stainable wood filler
- Furniture markers: Touch up visible screws or minor damage with furniture touch-up markers
Designer Trick: If making your plugs, cut them from an inconspicuous area of the same piece (like the underside) for perfect grain and color matching.
Reinforcing Weak Points
Identify and strengthen potential problem areas:
- Corner blocks: Add triangular blocks with glue and screws to reinforce frame corners
- Cross braces: Install additional bracing for tables and shelves that might experience sagging
- Metal brackets: Use small, inconspicuous L-brackets to reinforce joints
- Additional fasteners: Where design permits, add extra screws at stress points
Preventive approach: Reinforce based on the intended use—dining tables need more structural support than occasional tables, for example.
Mastering these advanced DIY furniture assembly techniques transforms the process from simply following instructions to creating furniture that looks better and lasts longer. These methods address the inherent limitations of mass-produced furniture kits while adding professional-quality refinements.
With practice, you’ll develop an intuitive understanding of when and how to apply these techniques, resulting in furniture that performs beyond its price point.
Finishing Touches
After completing the technical aspects of furniture assembly, these finishing steps transform your newly built piece into a polished, functional part of your home:

Cleaning the Furniture After Assembly
Remove all assembly residue for a pristine finish:
- Dust removal: Wipe down all surfaces with a microfiber cloth to remove wood dust and packaging debris
- Adhesive residue: Remove stickers and tape residue with a mild solution of warm water and dish soap
- Fingerprints and smudges: Clean glass and glossy surfaces with appropriate cleaners
- Hardware cleaning: Wipe down handles and knobs to remove any oils from handling
Material-specific considerations:
- For wood: Use a slightly damp cloth, followed by a dry one
- For laminates: All-purpose cleaner on a soft cloth
- For metal: Specialty metal cleaners or a vinegar solution for stubborn spots
- For upholstery: Vacuum with an upholstery attachment
Applying Furniture Polish or Protectant
Add protection and enhance appearance:
- Wood furniture: Apply a quality furniture polish or wax appropriate for the finish
- Leather surfaces: Use leather conditioner to prevent drying and cracking
- Metal components: Consider a light application of metal polish for brass, chrome, or stainless steel
- Glass elements: Apply glass cleaner and polish with a lint-free cloth
Protection tip: For frequently used surfaces like dining tables, consider applying a protective finish like polyurethane or furniture wax to guard against spills and wear.
Leveling the Furniture
Ensure stability and prevent unnecessary wear:
- Check with a level: Use a spirit level on horizontal surfaces
- Adjust leveling feet: If your furniture has adjustable feet, turn them accordingly
- Add furniture levelers: For pieces without built-in adjusters, adhesive-backed levelers can be added
- Floor protection: Install felt pads or furniture glides to protect flooring
Uneven floor solution: For persistent wobbling on uneven floors, try adjustable furniture levelers that can compensate for variations up to 1/4 inch.
Arranging Furniture in the Room
Position your new piece for both function and aesthetics:
- Practical placement: Consider traffic flow, function, and accessibility
- Wall clearance: Leave appropriate space between tall furniture and walls
- Safety considerations: Ensure tippy furniture is anchored to walls with anti-tip devices
- Aesthetic arrangement: Position within your existing layout for visual balance
Designer tip: Keep furniture 1-2 inches from walls to prevent scuffs and allow air circulation, which helps prevent moisture-related issues.
Final Safety Checks
Before considering the assembly complete:
- Stability test: Gently push or pull the furniture from different angles to ensure stability
- Moving parts: Test doors, drawers, and other moving elements for smooth operation
- Sharp edges: Check for and address any sharp corners or edges
- Weight limits: Understand and respect the weight capacities for shelves and surfaces
- Secure anchoring: Install anti-tip straps for tall pieces, especially in homes with children or pets
Child and pet safety: Consider additional safety measures like corner protectors, drawer locks, or cabinet latches if you have young children or pets.
Documentation
Keep important information for future reference:
- Store instructions: Keep assembly instructions in a folder for future reference
- Warranty information: File warranty cards and receipts
- Maintenance guidelines: Note any specific care instructions
- Leftover parts: Store extra hardware in a labeled bag attached to the furniture (tape under a drawer) or in a designated container
These finishing touches not only complete your furniture assembly project but also enhance its appearance, functionality, and longevity. Taking the time to properly finish and position your newly assembled furniture rewards you with pieces that look their best and function properly for years to come.
The sense of satisfaction from stepping back and seeing a beautifully assembled, properly positioned piece of furniture is the true reward of DIY furniture assembly.
How to assemble ANYTHING | DIY Furniture Guide
When to Call a Professional
While DIY furniture assembly is achievable for many projects, some situations warrant professional assistance. Recognizing when to seek help can save time, prevent damage, and ensure safety.
Recognizing When Assembly Is Too Complex
Consider professional help when:
- Instructions seem overwhelming: If you can’t make sense of the assembly guide after careful review
- Structural complexity: Furniture with complex mechanisms like wall beds, reclining sofas, or adjustable desks
- Size and weight concerns: Very large or heavy pieces that require multiple people to manipulate safely
- Technical requirements: Items needing electrical work or permanent attachment to building structures
- Valuable investments: High-end furniture where mistakes could be costly
Self-assessment questions:
- Do you have the necessary tools and space?
- Do you have sufficient time to complete the assembly properly?
- Do you have the physical ability to safely handle the components?
- Have you successfully assembled similar items before?
If you answer “no” to multiple questions, professional assembly may be the wiser choice.
Benefits of Hiring a Professional Furniture Assembler
Professional assemblers offer several advantages:
- Expertise: Professionals have assembled hundreds or thousands of pieces, developing efficiency and problem-solving skills
- Proper tools: They come equipped with specialized tools for furniture assembly
- Time efficiency: What might take you hours or days can often be completed in a fraction of the time
- Guaranteed results: Many professional services offer guarantees on their work
- Reduced stress: Eliminate the frustration that can come with complex assembly
- Safety: Professionals know how to handle heavy items and avoid injury
Cost-benefit consideration: When evaluating the cost of professional assembly, factor in the value of your time, potential tool purchases, and the risk of damage to the furniture.
Finding Reputable Furniture Assembly Services
Options for finding qualified help:
- Retailer services: Many furniture retailers offer assembly services at the time of purchase
- Dedicated assembly companies: Services like TaskRabbit, Handy, or Amazon Home Services specialize in furniture assembly
- Local handyman services: Independent contractors often provide assembly services
- Recommendations: Ask friends, family, or neighbors for trusted referrals
Vetting professionals:
- Check reviews and ratings on platforms or social media
- Verify insurance coverage
- Ask about experience with specific brands or furniture types
- Request clear pricing information upfront
- Confirm whether disposal of packaging is included
Potential Cost Considerations
Professional assembly fees vary based on several factors:
| Furniture Type | Typical Cost Range | Time Estimate |
|---|---|---|
| Simple bookcase | $40-$80 | 30-60 minutes |
| Bed frame | $80-$150 | 1-2 hours |
| Dining table & chairs | $100-$200 | 1-3 hours |
| Entertainment center | $120-$250 | 2-4 hours |
| Office desk | $100-$200 | 1-3 hours |
| Wardrobe/armoire | $150-$300 | 2-4 hours |
Additional cost factors:
- Geographic location
- Complexity of the specific model
- Rush service fees
- Weekend or evening appointments
- Stair fees for multi-level homes
- Minimum service charges
Value-added services: Some assemblers offer additional services like furniture placement, packaging disposal, or mounting TVs and shelves to walls.
Working Effectively with Professional Assemblers
To get the most from professional assembly services:
- Clear space: Prepare the assembly area before they arrive
- Verify inventory: If possible, check that all parts are present before the appointment
- Communicate expectations: Discuss exactly where you want the assembled piece positioned
- Be available: Remain accessible for questions during assembly
- Inspect the work: Check the finished piece thoroughly before the assembler leaves
Remember that even with professional assembly, you should still perform all the same finishing steps: cleaning, leveling, and performing safety checks before using the furniture.
While DIY furniture assembly offers satisfaction and cost savings, there’s no shame in recognizing when professional help is the smarter choice. Quality furniture represents a significant investment, and proper assembly ensures you’ll enjoy its full value for years to come.
Conclusion
Successfully assembling ready-made furniture transforms flat-packed components into functional, beautiful pieces that enhance your living space. Throughout this guide, we’ve covered the essential aspects of furniture assembly, from preparation and tool selection to advanced techniques and professional finishing touches.
Proper assembly is indeed the foundation of furniture longevity. A well-assembled piece can provide years of reliable service, while hastily or incorrectly assembled furniture may wobble, break, or fail prematurely. The time invested in careful assembly pays dividends in durability and performance.
The DIY furniture assembly process offers more than just cost savings—it provides the satisfaction of creating something tangible with your own hands. Each completed project builds confidence and skills that transfer to future assembly tasks and other home improvement projects.
Remember these key takeaways:
- Preparation is critical: Read instructions thoroughly, inventory all parts, and organize your workspace before beginning
- Use the right tools for the job: Quality tools make assembly easier and reduce the risk of damage
- Follow the sequence: Resist the urge to skip ahead in the instructions
- Don’t force components: If pieces don’t fit, stop and reassess rather than forcing them
- Take your time: Rushing leads to mistakes that compromise both appearance and structural integrity
- Apply finishing touches: Cleaning, leveling, and proper placement complete the assembly process
- Know when to seek help: Some projects benefit from professional assistance
We encourage you to share your furniture assembly experiences, tips, and questions in the comments section below. Your insights might help fellow readers with their projects, and our community can guide specific challenges you’ve encountered.
Start Assembling Your Furniture with Confidence!
Armed with the knowledge, techniques, and troubleshooting skills covered in this guide, you’re well-equipped to tackle your next furniture assembly project with confidence. Each piece you successfully assemble adds to your skill set and transforms your living space with your personal touch.
Frequently Asked Questions
How long should furniture assembly typically take?
Assembly time varies greatly depending on the furniture type and complexity. Simple pieces like a basic bookshelf might take 30-60 minutes, while more complex items like wardrobes or entertainment centers can require 2-4 hours or more. First-time assemblers should plan for approximately double the time estimated in the manufacturer’s guide.
What should I do if parts are missing from my furniture kit?
First, thoroughly check all packaging materials and the assembly area. If parts are truly missing, contact the manufacturer directly using the customer service information provided with your purchase. Most reputable companies will ship replacement parts at no cost. Having the model number, purchase date, and specific missing part information ready will expedite this process.
Is it worth spending extra money on better-quality tools for furniture assembly?
If you plan to assemble multiple pieces of furniture over time, investing in quality basic tools is worthwhile. Good screwdrivers, Allen wrenches, and a drill with screwdriver bits will make assembly easier and reduce the risk of stripping screws or damaging furniture. However, for a one-time assembly project, the included tools are usually adequate if used carefully.
How can I make my assembled furniture more stable?
Several techniques can improve stability: ensure all fasteners are properly tightened (but not over-tightened), add wood glue to dowel joints where possible, use furniture brackets to reinforce corner connections, ensure the furniture sits on a level surface, and consider adding cross-bracing to shelving units prone to lateral movement.
Can I disassemble and reassemble RTA furniture when moving?
Most RTA furniture can be disassembled for moving, though it may not retain the same level of stability after multiple assemblies. Take photos before disassembly, bag and label all hardware, and protect screw holes and connection points during the move. Some connection types, particularly those using cam locks, may wear with repeated use, potentially requiring reinforcement during reassembly.
Sources:
10 Tips for Assembling Flat Pack Furniture
7 Tips for Assembling Flat Pack Furniture