How to easily install the Bordeaux using wood panels
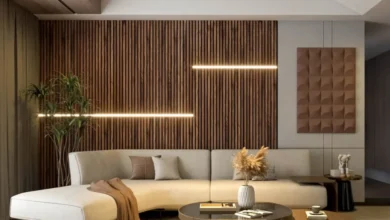
There is something timeless in the clear and classic paneling lines. Whether you want to add elegance to a corridor, heat to a bedroom or a refined feeling to your living room, the installation of paneling using wooden panels is one of the most effective ways to transform a space, without the need for complete reshaping.
If you were wondering How to install paneling Without the headache to hire entrepreneurs or manage disorderly construction, you are in the right place. With today’s quality wooden panel options, the creation of a beautifully finished DIY wall can be a simple DIY project that allows you to save money while offering a high impact upgrade.
At Woody Walls, we think that upgrading your walls should be accessible, ecological and beautiful. Our solid wood lap panels and our Pel-And-Stick wooden boards offer easy installation with amazing results, helping you give life to your vision without the usual renovation frustrations. Whether you are targeting a modern accent wall or a traditional paneling look, our range of panels facilitates the design of a space that seems only yours.


Ready to dress your walls and give your home a conventional sophistication touch? Let’s see yourself going through everything you need to know How to install paneling – Step by step.
What is Wainscot?
Robbery is a decorative and functional wall treatment which generally covers the lower part of your walls, adding an architectural interest and a finished look on any room. Originally used in historic houses to protect the plaster walls from scratches and humidity, drinks have become a design functionality that mixes both classic charm and modern style.
Using Paneling panels on the walls Created not only of the visual depth, but can also make a room feel larger by drawing the eye upwards. You can choose from different heights depending on the style you want to make, with a traditional chair rail at the woodwork from floor to ceiling for a daring declaration.
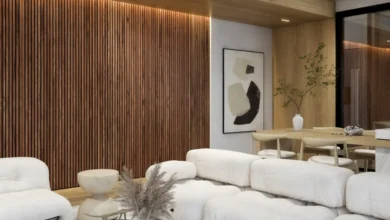
What makes wall panels panelg Today, it is particularly attractive today. Whether you are looking to add a comfortable and rustic feeling to a living space or a clean and contemporary look in a corridor, the wooden panels can be adapted to your aesthetics. And with good materials, as Solid wooden slatted panels Or Pel-And-Stick wooden boardsCarrying out a professional look is easier than ever, even if you are new in DIY projects.
In the next section, we will help you choose the best wooden panels for your paneling project, so that you can move forward with confidence by creating a classic and elegant interior upgrade.
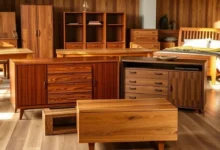
Choose the right wooden panels for paneling
The selection of good wooden panels will set the tone for your paneling project and will ensure a high quality sustainable finish.
What to consider when choosing the panels:
- Height of your paneling: The lower heights create a classic and balanced look. The full height panels deliver a daring modern statement.
- Style of your space: Make the existing design of your room match, whether traditional, rustic or contemporary.
- Color and finish: Choose tones that complete your current palette, hot brown with elegant modern neutrals.
Woody Walls panels are ideal for paneling:
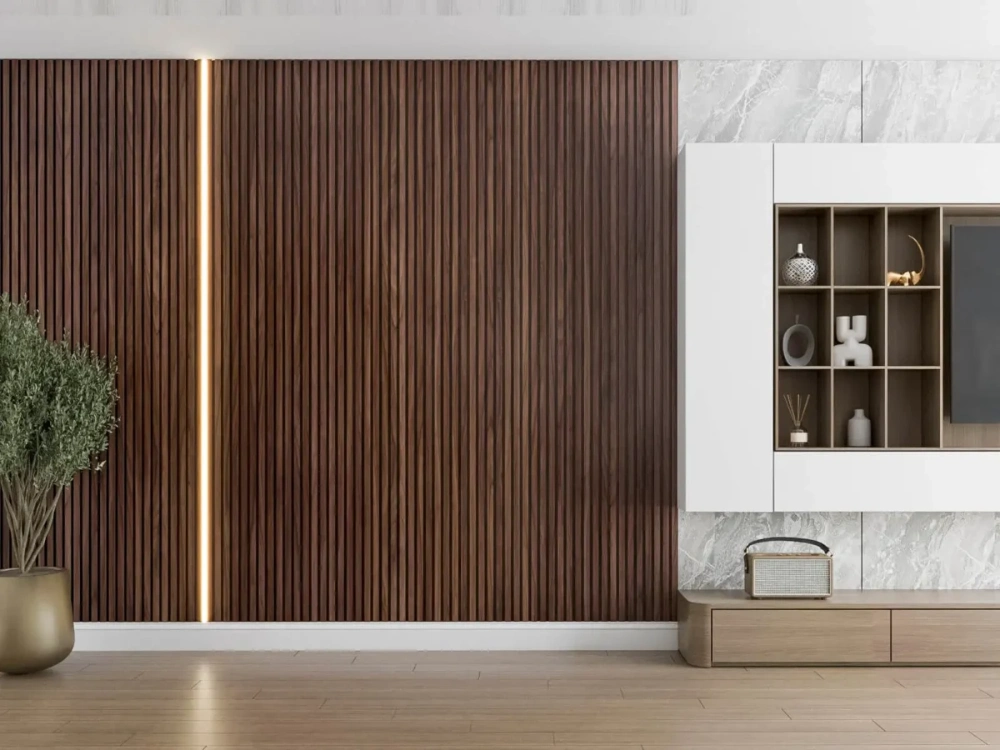
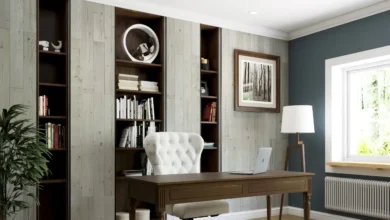
Provide clean and modern lines while improving the absorption of sound. Perfect for fairs, home offices and corridors.

Allow an easy and toolless installation without nails or glue. Ideal for beginners looking for a clean professional result without heavy tools.
With the right panels chosen, you are ready to collect the tools and materials necessary to start your project with confidence.
Tools and materials you will need
Before you start learning How to install panelingGather all the tools and materials necessary to ensure a fluid and effective workflow.
Essential tools:
- Tape measure
- Pencil
- Level
- Cadrou
- Miter or hand saw saw (for cutting panels if necessary)
- Nails or hammer pistol with finishing nails
- Construction adhesive (if it is not used with pel and stick panels)
- Calou and caulking gun
- Sanding block (for the preparation of a minor surface)
- Paint or spot (optional, if you want to personalize your panels)
Materials:
- Wooden panels for paneling (panels with acoustic slats, coat and stick boards or chosen style)
- Cutting or molding for the upper edge (optional for a finished look)
- Painter ribbon (to mark the directives and protect the edges)
If you use Pel-And-Stick wooden boardsYou will not need adhesives, nails or heavy tools. These panels can be applied directly to your wall, which makes them ideal if you want to know How to install paneling On dry partitions without additional waste or complexity.
Taking the time to prepare your tools and materials will help your lambris installation will go well, guaranteeing clean lines and a professional finish.
Then you will learn How to install paneling And start installing your panels with confidence.
Stepmed guide: how to install paneling
How to install paneling? The installation of paneling using wooden panels is an enriching DIY project that can considerably improve your space. Here is a clear and step -by -step guide to help you get a clean and professional finish.
1. Plan your layout
- Measure the height of the wall and decide the height you want your scholarship to be.
- Mark the upper edge of your panels using a level and a pencil to ensure a right guide.
- Use a crampon to locate and mark the studs along the wall. This will help you when the panels are securing.
2. Prepare your walls
- Carefully clean the surface of the wall to remove dust and debris.
- If you install paneling on the dry partitions, slightly sand shiny areas for better grip.
- Repair all holes or cracks in the wall to ensure a smooth application surface.
3. Cut and measure the panels
- Measure and cut the panels to adapt to your wall, taking into account the sockets, corners and windows.
- Use a jab saw for clean edges, especially if you add garnishes or moldings.
- Drying panels along the wall to confirm the alignment before fixing.
4. Install the panels

- For Pel-et-Bâton signs:
- Remove the adhesive support and press the wall firmly, from a corner and working.
- Use a level frequently to make sure that the panels remain directly during installation.
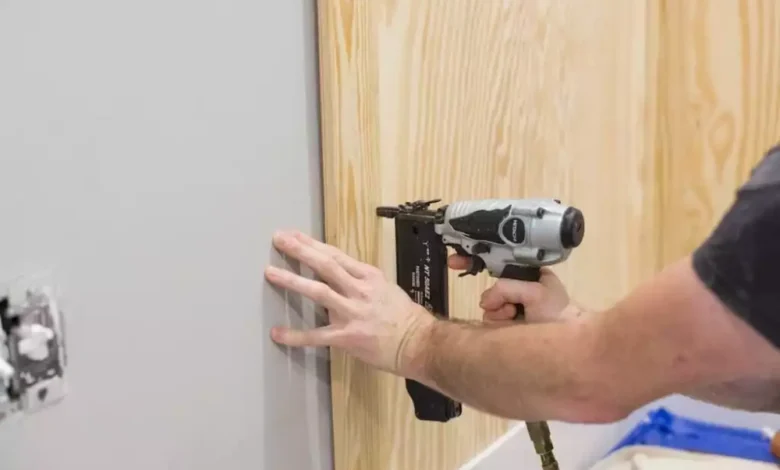
- For traditional wooden panels:
- Apply the construction adhesive to the back of each panel.
- Position panels on the wall, pressing firmly, then fix with finishing nails in studs.
- Check the alignment continuously to maintain its own level lines.
5. Add a garnish and a finish
- Install the upper garnish or the molding to create a finished edge along the top of your paneling if you wish.
- Fill the nail holes with wood filling and sand lightly once dry.
- Caulking seams where the panels meet for a transparent appearance.
6. Painting or spot (optional)
- If you wish, paint or stain your paneling panels to match the aesthetics of your room.
- Use the painter adhesive tape to protect adjacent walls and floors during this step.
Once finished, your new paneling will give your room a clean and classic look while adding value and heat to your space.
Then we will cover the advice for How to install paneling in the bathrooms And keep your panels to make sure they stay beautiful for years.
Installation of paneling in bathrooms and care advice
Robbery Can add heat and style to the bathrooms, which makes small spaces more welcoming while protecting your walls from splashes and daily wear.
How to install paneling in the bathroom
- Check ventilation: A good flow of air is essential to prevent the accumulation of humidity behind your panels. The paneling is suitable for powder rooms and ventilated bathrooms, but should not be installed in high hide areas such as interior showers.
- Choose humidity -resistant panels: Use panels designed for inner use with lasting finishes. Wooded wall panels can be used in bathrooms with normal humidity, provided that the space is properly ventilated.
- Prepare the walls: Clean and dry the walls carefully before installation to prevent humidity from trapping behind the panels.
- Seal the edges and seams: Apply the caulking when the panels meet to avoid humidity infiltration. Use waterproof caulking for additional protection in areas subject to occasional splashes.
- Height considerations: Drinks can be installed at standard heights (about 36 inches) or more to create a wall of characteristics behind sinks or baths, depending on your design goals.
Care and maintenance advice
- Regular cleaning: Wipe the panels with a soft and damp cloth to remove dust and splashes. Avoid using hard chemicals that can damage finishes.
- Check the caulking periodically: Inspect the seams and reappear the caulking if necessary to maintain moisture protection.
- Avoid prolonged exposure to water: Although the panels can manage humidity, avoid letting water oppose water to ensure long -term durability.
Maintaining your paneling will help keep its beauty while adding a timeless and elegant look to your bathroom for years to come.
Transform your space with wooded walls
When you learn How to install paneling is one of the most effective ways to raise the style of your home while adding heat and character to any room. With the right preparation and the right panels, you can get a professional and timeless appearance without the hassle of a complete renovation.
HAS Wooded wallsWe believe that we must make the beautiful design accessible. OUR Wall panels with acoustic slats And Pel-And-Stick wooden boards are made for easy installation and suitable for DIY while providing amazing results. All our panels are made from durable wood, finished with non -toxic materials and are still in stock with fast and free American shipping, so you can transform your space without delay.
Whether you update your living room, corridor or bathroom, adding paneling can completely change the feeling of your home. It is a practical upgrade that protects your walls while adding architectural interest and classic beauty.
Ready to dress your walls? Explore the wooded walls today and discover how easy it is to give life to your vision.