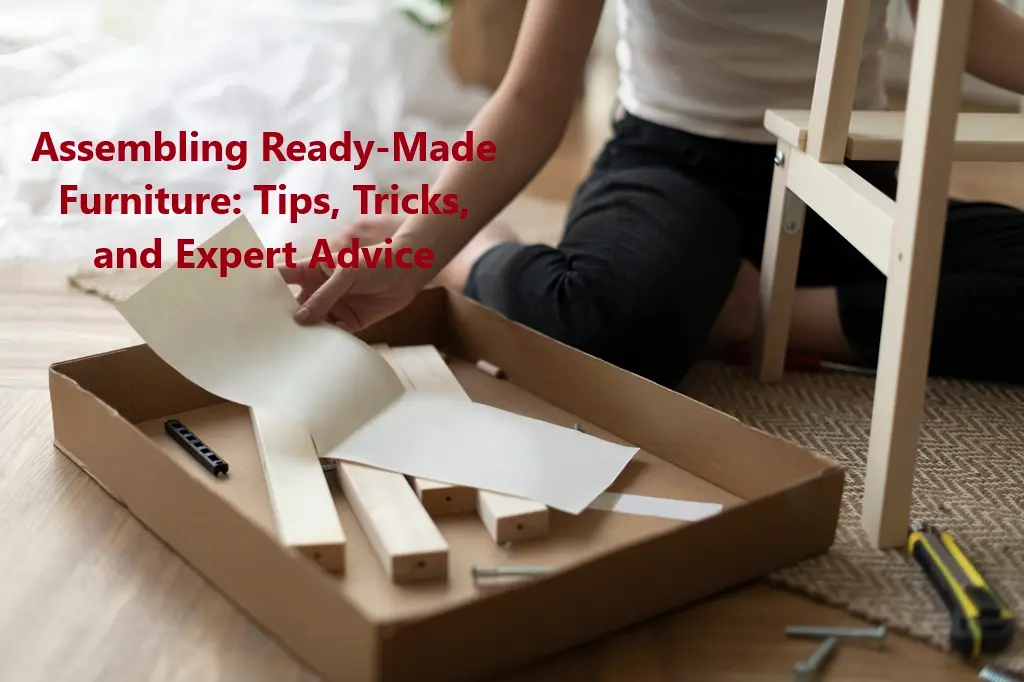
تجميع الأثاث الجاهز: نصائح وحيل ونصائح الخبراء
مقدمة
أحدث الأثاث الجاهز، المعروف أيضًا باسم الأثاث الجاهز للتجميع (RTA) أو الأثاث المُجمّع، ثورةً في طريقة تأثيث منازلنا. تأتي هذه البدائل الاقتصادية للقطع المُجمّعة بالكامل مُغلّفة بعناية في صناديق صغيرة، وتتطلب من المشتري تجميعها. في حين أن احتمالية... تجميع الأثاث الجاهز قد يبدو الأمر صعبًا في البداية، ولكن مع المعرفة والأدوات المناسبة، يمكنك تحويل تلك الحزم المسطحة إلى قطع جميلة وعملية لمنزلك.
تزداد شعبية أثاث RTA لسبب وجيه. فمقارنةً بالأثاث المُجمّع بالكامل، تُقدّم خيارات RTA مزايا عديدة: فهي عادةً ما تكون أقل تكلفة، وأسهل نقلًا، وتُتيح لك الشعور بالرضا عن بناء شيء ما بنفسك. ومع ذلك، تأتي هذه المزايا مع بعض التنازلات، بما في ذلك الوقت اللازم للتجميع، وإمكانية... جودة المخاوف إذا لم يتم بناؤها بشكل صحيح، وفي بعض الأحيان تكون هناك أجزاء مفقودة أو تالفة.
مفتاح إطالة عمر أثاثك الجاهز ومتانته يكمن في التركيب الصحيح. فخزانة الكتب غير المُركّبة جيدًا أو الطاولة غير المستقرة ليست مجرد منظر غير مرغوب فيه، بل قد تُشكّل خطرًا على السلامة. إن تخصيص الوقت الكافي لتجميع أثاثك بشكل صحيح يضمن ثباته وفعاليته وطول عمره.
في هذا الدليل الشامل، سنوضح لك كل ما تحتاج إلى معرفته حول تجميع الأثاثمن الأدوات الأساسية وخطوات التحضير إلى تعليمات التجميع المفصلة ونصائح استكشاف الأخطاء وإصلاحها. سواء كنت تجميع الأثاث بنفسك إذا كنت مبتدئًا أو تبحث عن تحسين مهاراتك، سيساعدك هذا الدليل على معالجة مشكلتك التالية مشروع أثاث بكل ثقة.


الأدوات والمواد الأساسية
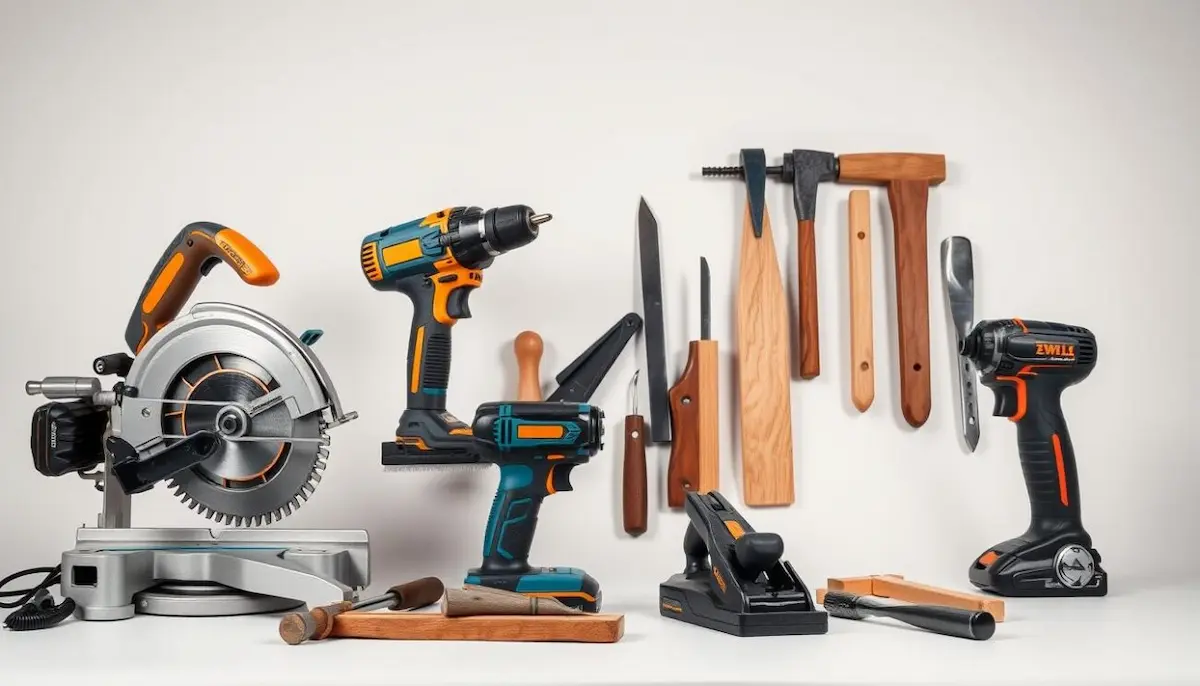
الحصول على الأدوات المناسبة في متناول اليد قبل البدء تجميع الأثاث يمكن لمشروعك أن يُحدث فرقًا بين تجربة سلسة وممتعة وتجربة مُحبطة. إليك قائمة مُفصلة بالأدوات التي ستحتاجها:
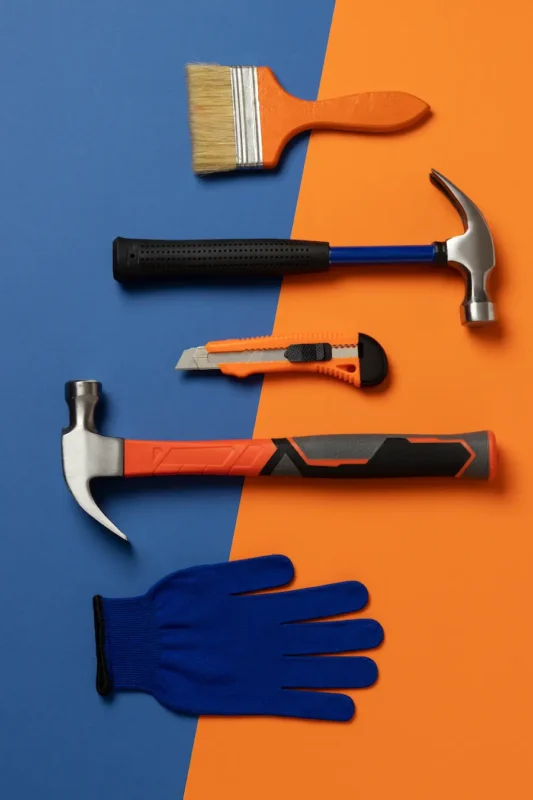
الأدوات الضرورية
- مفكات البراغيمجموعة من مفكات براغي فيليبس ومسطحة الرأس بأحجام مختلفة. ننصحك بشراء مفك براغي متعدد الرؤوس، مثل مفك براغي كلاين تولز 32500 متعدد الرؤوس 11 في 1، لمزيد من التنوع.
- مفاتيح ألين (مفاتيح سداسية):تستخدم معظم قطع أثاث RTA مسامير سداسية. وبينما يُرفق المصنعون عادةً مفتاح ألين اللازم، فإن وجود مجموعة عالية الجودة مثل طقم مفاتيح TEKTON 25282 سداسية الذراع الطويلة المكونة من 26 قطعة يضمن قوة رفع أفضل وسهولة في التركيب.
- مطرقة مطاطية:مثالية لطرق القطع برفق دون إتلاف الأسطح. مطرقة TEKTON 30603 الناعمة ذات الوجهين خيار رائع.
- مستوى:ضروري لضمان ثبات أثاثك بشكل متساوٍ. يوفر ميزان ستانلي 42-324 مقاس 24 بوصة دقةً عاليةً في عبوة متينة.
- شريط قياس: لتأكيد الأبعاد والموضع. قفل الطاقة ستانلي 33-425 بطول 25 قدمًا شريط قياس موثوقة وسهلة الاستخدام.
أدوات إضافية مفيدة
- مثقاب كهربائي مع رؤوس مفك براغيعلى الرغم من كونه اختياريًا، يُسرّع المثقاب الكهربائي عملية التجميع بشكل ملحوظ. يوفر المثقاب اللاسلكي BLACK+DECKER 20V MAX قيمة ممتازة للاستخدام العرضي.
- قفازات العمل:يحمي يديك من الشظايا والحواف الحادة.
- سكين متعدد الاستخدامات:لفتح العبوات وقطع الروابط البلاستيكية.
- منزلقات الأثاث:جعل وضع القطع الثقيلة أسهل دون إتلاف الأرضيات.
قائمة التحقق من المواد
بالإضافة إلى الأدوات المضمنة مع أثاثك، قد ترغب في الاحتفاظ بهذه المواد الإضافية في متناول يدك:
- غراء الخشب:لتعزيز المفاصل (يعتبر غراء الخشب الممتاز Titebond II ممتازًا).
- براغي ومسامير إضافية:إن وجود قطع غيار بأحجام شائعة يمكن أن يوفر عليك رحلة إلى الأجهزة محل.
- وسادات لباد الأثاث:يحمي أرضياتك من الخدوش.
- أقلام التحديد:لتغطية الخدوش البسيطة بمطابقة ألوان الخشب.
- تلميع الأثاث:لـ التشطيب المس بمجرد اكتمال التجميع.
كل أداة تخدم غرضًا محددًا في تجميع الأثاث عملية. أدوات الجودة يُسهّل العمل ويساعد في منع تلف أثاثك الجديد. قد يكون من المغري استخدام أدوات مؤقتة (مثل استخدام سكين الزبدة كمفك براغي)، إلا أن الأدوات المناسبة تقلل من خطر تجريد البراغي وتلف الأثاث. شخصي إصابة.
قبل البدء بأي شيء تجميع الأثاث بنفسك مشروعك، سجّل هذه الأدوات والمواد. الاستعداد الجيد يوفر عليك الوقت والجهد لاحقًا.
التحضير هو المفتاح
إن الأساس الذي وضعته قبل التقاط برغي واحد يمكن أن يحدد نجاح مشروعك. تجميع الأثاث إن التحضير الجيد لا يُسهّل عملية التجميع فحسب، بل يساعد أيضًا على تجنب الأخطاء التي قد تؤثر على استقرار ومظهر أثاثك.
اقرأ التعليمات بعناية
قد يبدو هذا واضحًا، لكنها خطوة يتجاهلها الكثيرون مما يضرّهم. قبل لمس أيٍّ من المكونات:
- اقرأ دليل التعليمات بالكامل من البداية إلى النهاية
- انتبه إلى أي تحذيرات أو ملاحظات خاصة
- فهم تسلسل التجميع العام
- حدد أي خطوات قد تتطلب المساعدة
- ابحث عن رموز الاستجابة السريعة التي قد تؤدي إلى مقاطع فيديو مفيدة دروس تعليمية
يوفر العديد من المصنّعين الآن موارد إلكترونية بالإضافة إلى التعليمات المطبوعة. إذا كان الدليل المرفق غير واضح أو تالف، فراجع موقع الشركة الإلكتروني للحصول على نسخ رقمية أو فيديوهات تجميع.
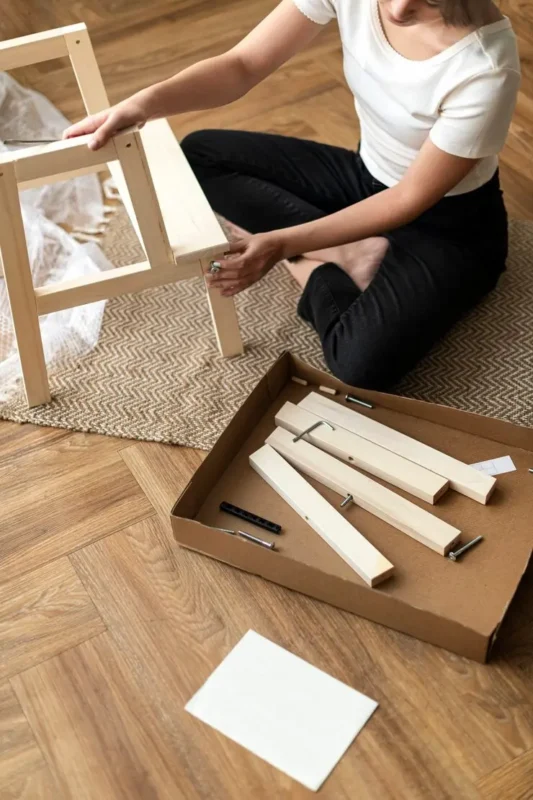
جرد جميع الأجزاء
قد يؤدي فقدان أو تلف المكونات إلى إعاقة تقدمك وإحباطك. لتجنب ذلك:
- إفراغ جميع مواد التغليف بشكل كامل
- عد كل جزء والتحقق منه مقابل قائمة المخزون
- تنظيم الأجهزة (البراغي، والمسامير، والمسامير الخشبية، وما إلى ذلك) حسب النوع والحجم
- احتفظ بالأجهزة الصغيرة في حاويات مُسمّاة أو أكياس ساندوتش
- التحقق من وجود أي مكونات تالفة قد تحتاج إلى الاستبدال
إذا وجدتَ أي أجزاء مفقودة أو تالفة، فاتصل بالشركة المُصنِّعة فورًا. تُشحن معظم الشركات الموثوقة قطع الغيار البديلة بسرعة، وغالبًا بدون أي تكلفة إضافية.
إنشاء مساحة عمل منظمة
بيئة التجميع الخاصة بك تؤثر بشكل كبير على تجربتك:
- قم بإخلاء مساحة أكبر من أبعاد الأثاث النهائي
- تأكد من الخير إضاءة (يمكن أن يكون المصباح الأمامي مفيدًا للتصميمات الداخلية للخزانات المظلمة)
- العمل على سطح نظيف ومستوٍ
- تأكد من وجود منفذ طاقة قريب إذا كنت تستخدم أدوات كهربائية
- قم بإزالة الحيوانات الأليفة والأطفال الصغار من المنطقة من أجل السلامة
بالنسبة للقطع الأكبر حجمًا مثل الأسرة أو خزائن الملابس، قم بتجميعها في الغرفة التي ستوضع فيها في النهاية لتجنب مشاكل إزالة الباب.
حماية أرضياتك
يمكن لعملية التجميع أن تتسبب في إتلاف الأرضيات بسهولة:
- ضع بطانية أو قطعة قماش أو كرتونًا للعمل عليها
- استخدم مواد تغليف الأثاث كطبقة واقية
- ضع في اعتبارك استخدام حصائر الرغوة المتشابكة للحصول على حماية أكبر
- احتفظ بأدوات نقل الأثاث في مكان قريب لإعادة وضع القطع الثقيلة
تحديد الأجزاء والأجهزة
قبل البدء بالتجميع:
- قم بوضع جميع الأجزاء وفقًا للرسم التخطيطي الموجود في التعليمات
- تجميع المكونات المتشابهة معًا
- تعرف على أنواع البراغي والمسامير المختلفة
- لاحظ أي علامات اتجاهية على الأجزاء (غالبًا ما يتم الإشارة إليها بواسطة ملصقات أو أسهم)
- قم بفرز الأجهزة مسبقًا حسب خطوة التجميع إذا تم تنظيم التعليمات بهذه الطريقة
يقوم العديد من جامعي الأثاث ذوي الخبرة بالتقاط صور لجميع المكونات قبل البدء، مما يؤدي إلى إنشاء مرجع مرئي يمكن أن يكون مفيدًا إذا اختلطت القطع أثناء التجميع.
هذه المرحلة التحضيرية، على الرغم من تجاهلها أحيانًا في خضم الإثارة التي تصاحب إكمال أثاثك الجديد، تشكل الأساس للنجاح تجميع الأثاث بنفسكإن تخصيص الوقت للتحضير بشكل صحيح يوفر الوقت بشكل عام ويقلل من احتمالية حدوث أخطاء قد تؤثر على السلامة الهيكلية للقطعة النهائية.
عملية التجميع خطوة بخطوة (عامة)
في حين محددة تجميع الأثاث تختلف التعليمات باختلاف المنتج، إلا أن معظم الأثاث الجاهز يتبع تسلسل تجميع مشابه. ينطبق هذا الدليل العام على العديد من القطع الشائعة، مثل خزائن الكتب، والطاولات، والأسرة، والخزائن.
1. تخطيط جميع الأجزاء
- ضع جميع المكونات الخشبية/المعدنية على سطح العمل المحمي
- رتبهم منطقيًا، مع تجميع القطع المتشابهة معًا
- قم بتوجيههم وفقًا لموقف التجميع النهائي الخاص بهم
- قم بالرجوع إلى مخططات الشركة المصنعة للتأكد من الوضع الصحيح
نصيحة احترافية:التقط صورة للأجزاء الموضوعة للرجوع إليها لاحقًا إذا لزم الأمر.
2. تحديد الأجهزة
- فصل وتحديد جميع مكونات الأجهزة
- قم بمطابقة البراغي والمسامير والمسامير الخشبية وأدوات التثبيت الأخرى مع قائمة الأجهزة
- فهم الغرض من كل نوع من الأجهزة
- تنظيم الأجزاء الصغيرة في حاويات حسب النوع أو حسب خطوة التجميع
دليل الأجهزة:
| نوع الأجهزة | الاستخدام الشائع | نصيحة التجميع |
|---|---|---|
| براغي الخشب | توصيلات مباشرة من الخشب إلى الخشب | الحفر المسبق لمنع الانقسام |
| أقفال ومسامير كام | اتصالات مخفية في الرفوف | أدخل البراغي أولاً، ثم قم بتوصيلها بأقفال الكاميرا |
| المسامير الخشبية | المحاذاة والتعزيز | مسامير التأكيد |
| مسامير التأكيد | توصيلات لوحة قوية | يتطلب فتحة تجريبية |
| دبابيس الرف | رفوف قابلة للتعديل | قم بالتركيب بشكل موحد للأرفف المستوية |
3. تجميع الإطار
- ابدأ بالعناصر الهيكلية الرئيسية
- اتبع التسلسل المحدد في تعليماتك
- يبدأ عادةً بالألواح الجانبية أو الأرجل
- قم بربط المثبتات يدويًا في البداية للسماح بالتعديلات
- تأكد من وجود زوايا قائمة عند الحاجة باستخدام مربع النجار
نصيحة احترافيةبالنسبة للقطع الأكبر حجمًا، فإن وجود شخص مساعد يحمل المكونات في مكانها يجعل هذه الخطوة أسهل كثيرًا.
4. قم بتركيب الألواح والدعامات
- أضف أرففًا أو فواصل أو أسطحًا للطاولة
- قم بتثبيت الظهر (عادةً باستخدام مسامير أو براغي صغيرة)
- أدخل قضبان الأدراج أو مفصلات الأبواب
- تأكد من أن جميع الدعامات مستوية ومحاذية بشكل صحيح
- التحقق من التربيع طوال هذه العملية
مهمغالبًا ما تُوفّر الألواح الخلفية دعمًا هيكليًا أساسيًا. لا تتغافل عن تثبيتها بشكل صحيح.
5. تركيب الأدراج والأبواب
- قم بتجميع الأدراج وفقًا للتعليمات
- قم بربط شرائح الأدراج بكل من الخزانة والأدراج
- قم بتركيب مفصلات الأبواب وربط الأبواب
- إجراء التعديلات الأولية لضمان التشغيل السليم
- اختبار حركة جميع الأجزاء المتحركة
نصيحة التعديلتحتوي معظم المفصلات الحديثة على براغي ضبط متعددة لضمان محاذاة مثالية للباب. ابحث عن براغي صغيرة لضبط الارتفاع والعمق والوضع الجانبي.
6. شد جميع البراغي والصواميل
- بمجرد اكتمال التجميع ومحاذاة كل شيء، ارجع وأحكم ربط جميع التوصيلات بالكامل
- احرص على عدم الإفراط في الربط، مما قد يؤدي إلى تجريد البراغي أو تقسيم الخشب
- تأكد من أن أقفال الكاميرا مثبتة بالكامل (عادةً ما يتم الإشارة إلى ذلك بواسطة سهم يشير إلى الحافة)
- تأكد من أن جميع الألواح مستوية وأن الفجوات قليلة
7. اختبار الاستقرار
- هز الأثاث برفق لاختبار ثباته
- تأكد من أن جميع الأدراج والأبواب تفتح وتغلق بسلاسة
- تأكد من أن القطعة مستوية على الأرضية
- إجراء أي تعديلات نهائية مطلوبة
ملاحظة السلامة:بالنسبة للأثاث الطويل مثل خزائن الكتب أو الخزائن أو دواليب الملابس، قم بتثبيت مجموعة منع الانقلاب المرفقة لتثبيت القطعة على الحائط، مما يمنع حوادث الانقلاب الخطيرة.
خلال كل خطوة، ارجع إلى تعليماتك ومخططاتك. التخطي للأمام أو اتباع طرق مختصرة أثناء تجميع الأثاث غالبًا ما يؤدي ذلك إلى مشاكل تتطلب التفكيك وإعادة العمل. إن أخذ وقتك واتباع التسلسل الصحيح يُنتجان قطعة أثاث أكثر متانة وعمرًا أطول.
تذكر ذلك تجميع الأثاث بنفسك ليس سباقًا. إذا واجهتَ أي ارتباك أو مقاومة أثناء التجميع، فتوقف وأعد التقييم بدلًا من تجميع المكونات بالقوة، مما قد يُسبب تلفًا.
استكشاف أخطاء التجميع الشائعة وإصلاحها
حتى مع التحضير الدقيق والاهتمام بالتفاصيل، يمكن أن تنشأ مشكلات أثناء تجميع الأثاث. وفيما يلي كيفية معالجة المشاكل الشائعة:
مسامير مجرّدة
العلامات:
- ينزلق المفك عند الدوران
- المسمار يدور ولكن لا يشد
- ضرر واضح في رأس المسمار
الحلول:
- استخدم شريطًا مطاطيًا:ضع شريطًا مطاطيًا بين مفك البراغي ورأس المسمار المجرد لتوفير قبضة إضافية
- جرب الكماشة:إذا كان رأس المسمار بارزًا بدرجة كافية، فامسكه باستخدام كماشة ذات أنف إبرة
- استخدم مستخرج البراغي:بالنسبة للبراغي المكسورة بشدة، قد تكون هناك حاجة إلى أداة استخراج مخصصة
- استبدال المسمار:في كثير من الأحيان يكون الحل الأبسط إذا كان لديك قطع غيار
وقاية:
- استخدم مفك البراغي بالحجم الصحيح
- قم بتطبيق الضغط لأسفل أثناء الدوران
- لا تشد أكثر من اللازم
- قم بحفر ثقوب تجريبية مسبقًا عند تثبيت البراغي في الخشب
الأجزاء غير المحاذية
العلامات:
- الثقوب لا تتطابق
- الألواح تجلس بشكل غير متساو
- فجوات مرئية بين المكونات
الحلول:
- قم بفك جميع أدوات التثبيت: قم بإزالة البراغي والمسامير للسماح بإعادة التموضع
- التحقق من الاتجاه الصحيح:تأكد من أن جميع الأجزاء تواجه الاتجاه الصحيح
- ابحث عن الحطام: قم بإزالة أي شيء يعيق الملاءمة المناسبة
- استخدم المشابك:حافظ على محاذاة الأجزاء أثناء التثبيت
- التحقق من المواد المشوهة:في بعض الأحيان يتطلب الانحناء الطفيف قوة لطيفة أو دعامة
وقاية:
- اتبع تسلسل التجميع بالضبط
- التحقق من اتجاه الجزء قبل التثبيت
- حافظ على أدوات التثبيت مفكوكة حتى يتم تثبيت جميع المكونات في مكانها
الأجهزة المفقودة
العلامات:
- عدد الأجهزة لا يتطابق مع قائمة المخزون
- تعذر إكمال التجميع بسبب وجود مثبتات مفقودة
الحلول:
- إعادة فحص التعبئة والتغليف:البحث بدقة في جميع مواد التغليف
- اتصل بالشركة المصنعة:ستقوم معظم الشركات بشحن قطع الغيار
- العثور على بدائل مناسبة:يمكن لمتاجر الأجهزة المساعدة في تحديد أدوات التثبيت المكافئة
- البدائل المؤقتة:استخدم مسامير ذات حجم مماثل من إمداداتك حتى وصول البدائل
وقاية:
- جرد جميع الأجهزة فورًا عند فتحها
- اتصل بالشركة المصنعة على الفور إذا كانت هناك أجزاء مفقودة
الأجزاء المكسورة
العلامات:
- الشقوق أو الرقائق أو الكسور المرئية
- الأجزاء التي لا تتناسب على الرغم من التوجيه الصحيح
الحلول:
- تقييم قابلية الإصلاح:قد يكون من الممكن إصلاح الضرر البسيط باستخدام غراء الخشب
- اتصل بالشركة المصنعة:بالنسبة للأجزاء التالفة بشكل كبير، اطلب استبدالها
- تلف المستندات:التقاط الصور للمطالبات بالضمان
- سياسة العائدات:إذا لم يتقدم التجميع كثيرًا، ففكر في إعادة الوحدة بأكملها
وقاية:
- فحص جميع الأجزاء قبل البدء في التجميع
- تعامل مع المكونات بعناية أثناء فك التعبئة والتجميع
أثاث متذبذب
العلامات:
- قطعة الصخور أو التحولات عند تحريكها
- أرجل أو دعامات غير متساوية
- عدم الاستقرار العام
الحلول:
- التحقق من استواء الأرضية:استخدم الحشوات أسفل الأرجل للأرضيات غير المستوية
- شد جميع المثبتات:الوصلات الفضفاضة هي سبب شائع للتذبذب
- تقوية المفاصل:أضف غراء الخشب إلى المفاصل (إذا كان التفكيك ممكنًا)
- إضافة أقواس:يمكن أن تعمل الأقواس على شكل حرف L على تقوية الزوايا الضعيفة
- التحقق من المكونات التالفة:استبدال أي عناصر هيكلية معرضة للخطر
وقاية:
- اتبع توصيات عزم الدوران للشد
- لا تتخطى أي مثبتات
- تأكد من تجميع القطعة على سطح مستوٍ
عند استكشاف المشكلات وإصلاحها أثناء تجميع الأثاثالصبر ضروري. إجبار المكونات أو شدها بشكل زائد لتعويض عدم المحاذاة غالبًا ما يفاقم المشكلة. إن تخصيص الوقت الكافي لتحديد السبب الجذري للمشكلة يؤدي إلى حلول أفضل وأكثر ديمومة.
تذكر أن العديد من الشركات المصنّعة لديها فرق خدمة عملاء مخصصة لمساعدتك في حل مشاكل التجميع. لا تتردد في التواصل معنا إذا واجهت أي مشاكل لا يمكنك حلها بنفسك.
نصائح وحيل متقدمة
بمجرد إتقانك لأساسيات تجميع الأثاثيمكن لهذه التقنيات المتقدمة أن ترفع نتائجك من الجودة الوظيفية إلى الجودة المهنية:
استخدام غراء الخشب لمزيد من الثبات
على الرغم من عدم ذكر ذلك دائمًا في تعليمات التجميع، فإن وضع كمية صغيرة من غراء الخشب على المفاصل يمكن أن يحسن المتانة بشكل كبير:
- أين تستخدم:يتم تطبيقه على وصلات المسامير، والوصلات الخشبية، ووصلات الألواح من الحافة إلى الحافة
- كم ثمن:طبقة رقيقة ومتساوية تكفي - الغراء الزائد سوف يخرج ويتطلب التنظيف
- توقيت:ضع الغراء قبل توصيل القطع مباشرة؛ امسح الزائد على الفور بقطعة قماش مبللة
- المعالجة:انتظر لمدة 24 ساعة حتى تصل إلى القوة الكاملة قبل الاستخدام المكثف
نصيحة الخبراء:للحصول على أقصى قدر من القوة، استخدم غراء الخشب PVA من النوع الثاني مثل Titebond II، والذي يوفر مقاومة للماء وخصائص ربط قوية.
حفر ثقوب تجريبية مسبقًا لمنع الانقسام
عند إضافة البراغي إلى خشب صلب عناصر:
- حجم لقمة المثقاب:استخدم حجمًا أصغر قليلًا من حجم العمود الداخلي للبرغي (باستثناء الخيوط)
- عمق:قم بحفر ما يقرب من 2/3 طول المسمار
- تقنية:حافظ على المثقاب عموديًا على السطح للحصول على ثقوب مستقيمة ومحاذاة بشكل صحيح
- الاعتبارات المادية:تستفيد الأخشاب الصلبة بشكل خاص من الثقوب التجريبية لمنع الانقسام
متى يتم الحفر المسبقاحرص دائمًا على الحفر المسبق عند العمل بالقرب من الحواف، أو في المواد الرقيقة، أو مع الأخشاب الصلبة. ويكون ذلك أقل أهمية في وسط ألواح الأخشاب اللينة أو الخشبية المصنعة.
استخدام المثقاب الكهربائي (بحذر)
يمكن أن يوفر المثقاب الكهربائي الوقت ولكنه يتطلب التعامل معه بعناية:
- إعدادات عزم الدوران:ابدأ بإعدادات عزم الدوران المنخفضة (1-3) لتجميع الأثاث
- التحكم في السرعة:استخدم التحكم في السرعة المتغيرة، وابدأ ببطء
- ضبط القابض:اضبط القابض على الانفصال قبل نزع البراغي أو إتلاف المواد
- اختيار البت:استخدم قطعًا عالية الجودة تناسب أدوات التثبيت بدقة
- تقنية:طبق ضغطًا ثابتًا مع الحفاظ على السيطرة
تحذير:لا تستخدم أبدًا مفكات الصدمات لتجميع الأثاث - فهي توفر عزم دوران كبيرًا جدًا ويمكن أن تتسبب في إتلاف مكونات الأثاث.
ربط البراغي والمسامير بشكل صحيح
إن إيجاد التوازن الصحيح أمر بالغ الأهمية:
- النهج التدريجي:شد على مراحل، والعمل حول القطعة بدلاً من شد منطقة واحدة بالكامل أولاً
- شد قفل الكاميرا:أدر في اتجاه عقارب الساعة حتى يشير السهم إلى الحافة أو نحو البرغي المطابق
- اشعر بالمقاومة:تعلم كيفية التعرف على متى يتم تثبيت المثبتات بشكل صحيح
- الفحص النهائي:بعد الانتهاء من التجميع، قم بإجراء فحص نهائي لجميع أدوات التثبيت
مخاطر الإفراط في التشديد:الخيوط المقشرة، وألياف الخشب المسحوقة، والألواح المنقسمة، والمفاصل المجهدة التي قد تفشل في وقت لاحق.
إخفاء ثقوب البراغي القبيحة
للحصول على لمسة نهائية احترافية:
- سدادات خشبية:شراء أو صنع سدادات خشبية تتناسب مع لون ونسيج أثاثك
- أقلام الشمع: املأ الثقوب الصغيرة بأقلام الشمع المخصصة للأثاث بألوان متطابقة
- حشو الخشب:للحصول على فجوات أكبر، استخدم حشو الخشب القابل للتلوين
- علامات الأثاث: قم بإصلاح البراغي المرئية أو الأضرار البسيطة باستخدام أقلام تحديد الأثاث
خدعة المصمم:إذا كنت تقوم بصنع المقابس الخاصة بك، قم بقصها من منطقة غير ظاهرة من نفس القطعة (مثل الجانب السفلي) للحصول على تطابق مثالي للحبوب والألوان.
تعزيز نقاط الضعف
تحديد وتعزيز مجالات المشاكل المحتملة:
- كتل الزاوية:أضف كتلًا مثلثة باستخدام الغراء والبراغي لتعزيز زوايا الإطار
- الأقواس المتقاطعة:قم بتثبيت دعامات إضافية للطاولات والأرفف التي قد تتعرض للترهل
- أقواس معدنية:استخدم أقواسًا صغيرة غير ظاهرة على شكل حرف L لتقوية المفاصل
- مثبتات إضافية:حيث يسمح التصميم، قم بإضافة مسامير إضافية عند نقاط الضغط
النهج الوقائي:قم بالتعزيز بناءً على الاستخدام المقصود - تحتاج طاولات الطعام إلى دعم هيكلي أكبر من الطاولات العرضية، على سبيل المثال.
إتقان هذه المتقدمة تجميع الأثاث بنفسك تُحوّل هذه التقنيات العملية من مجرد اتباع التعليمات إلى إنتاج أثاث ذي مظهر أفضل ويدوم لفترة أطول. تُعالج هذه الأساليب القيود الكامنة في مجموعات الأثاث المُنتجة بكميات كبيرة، مع إضافة تحسينات احترافية.
مع الممارسة، ستتمكن من تطوير فهم بديهي حول متى وكيف يمكنك تطبيق هذه التقنيات، مما يؤدي إلى إنتاج أثاث يعمل بشكل يفوق سعره.
اللمسات الأخيرة
بعد الانتهاء من الجوانب الفنية لـ تجميع الأثاثستعمل خطوات التشطيب التالية على تحويل القطعة التي تم بناؤها حديثًا إلى جزء مصقول وعملي من منزلك:
تنظيف الأثاث بعد التجميع
قم بإزالة جميع بقايا التجميع للحصول على لمسة نهائية نقية:
- إزالة الغبار:امسح جميع الأسطح بقطعة قماش من الألياف الدقيقة لإزالة غبار الخشب وبقايا التغليف
- بقايا لاصقة:قم بإزالة الملصقات وبقايا الشريط اللاصق باستخدام محلول خفيف من الماء الدافئ وصابون الأطباق
- بصمات الأصابع والبقع:تنظيف الزجاج والأسطح اللامعة باستخدام المنظفات المناسبة
- تنظيف الأجهزة:امسح المقابض والأزرار لإزالة أي زيوت ناتجة عن التعامل معها
اعتبارات خاصة بالمواد:
- بالنسبة للخشب: استخدم قطعة قماش مبللة قليلاً، ثم قطعة قماش جافة.
- للصفائح: منظف متعدد الأغراض على قطعة قماش ناعمة
- بالنسبة للمعادن: منظفات معدنية متخصصة أو محلول الخل للبقع العنيدة
- للتنجيد: قم بالتنظيف بالمكنسة الكهربائية باستخدام ملحق التنجيد
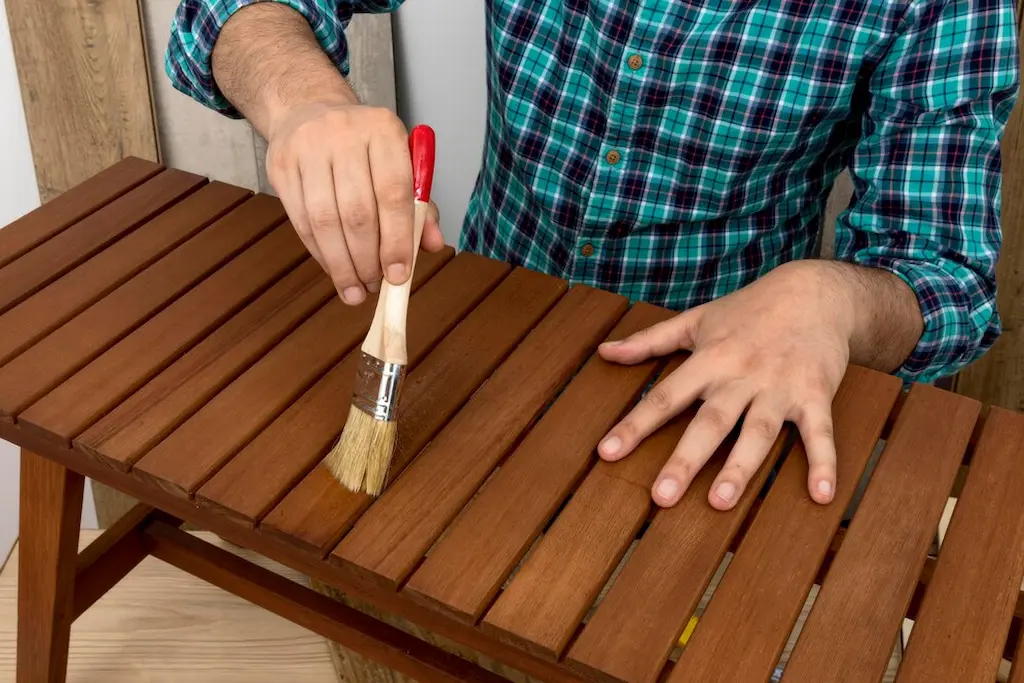
تطبيق ملمع أو واقي الأثاث
إضافة الحماية وتعزيز المظهر:
- أثاث خشبي:ضع ملمع أو شمع أثاث عالي الجودة مناسبًا للتشطيب
- أسطح جلدية:استخدم مرطب الجلد لمنع الجفاف والتشقق
- المكونات المعدنية:فكر في تطبيق خفيف لتلميع المعادن للنحاس أو الكروم أو الفولاذ المقاوم للصدأ
- عناصر زجاجية:ضع منظف الزجاج وقم بتلميعه بقطعة قماش خالية من الوبر
نصيحة للحماية:بالنسبة للأسطح المستخدمة بشكل متكرر مثل طاولات الطعام، فكر في وضع طبقة واقية مثل البولي يوريثين أو شمع الأثاث للحماية من الانسكابات والتآكل.
تسوية الأثاث
ضمان الاستقرار ومنع التآكل غير الضروري:
- التحقق من المستوى:استخدم ميزانًا على الأسطح الأفقية
- ضبط أقدام التسوية:إذا كان أثاثك يحتوي على أقدام قابلة للتعديل، فقم بتدويرها وفقًا لذلك
- إضافة مستويات الأثاث:بالنسبة للقطع التي لا تحتوي على أدوات ضبط مدمجة، يمكن إضافة مستويات ذات خلفية لاصقة
- حماية الأرضيات:قم بتثبيت وسادات اللباد أو زلاقات الأثاث لحماية الأرضيات
حل للأرضية غير المستوية:في حالة الاهتزاز المستمر على الأرضيات غير المستوية، جرب استخدام مستويات أثاث قابلة للتعديل يمكنها التعويض عن الاختلافات التي تصل إلى 1/4 بوصة.
ترتيب الأثاث في الغرفة
ضع القطعة الجديدة الخاصة بك في موضع مناسب للوظيفة والجمال:
- التدريب العملي:ضع في اعتبارك تدفق حركة المرور والوظيفة وإمكانية الوصول
- إزالة الجدار:اترك مساحة مناسبة بين الأثاث الطويل والجدران
- اعتبارات السلامة:تأكد من تثبيت الأثاث القابل للانقلاب على الجدران باستخدام أجهزة منع الانقلاب
- الترتيب الجمالي:وضعه داخل تخطيطك الحالي لتحقيق التوازن البصري
نصيحة المصمم:احتفظ بالأثاث على مسافة 1-2 بوصة من الجدران لمنع الخدوش والسماح بدوران الهواء، مما يساعد على منع المشاكل المرتبطة بالرطوبة.
فحوصات السلامة النهائية
قبل اعتبار التجميع كاملا:
- اختبار الاستقرار:ادفع الأثاث أو اسحبه برفق من زوايا مختلفة لضمان ثباته
- الأجزاء المتحركة:اختبار الأبواب والأدراج والعناصر المتحركة الأخرى لضمان التشغيل السلس
- حواف حادة:تحقق من وجود أي زوايا أو حواف حادة وقم بمعالجتها
- حدود الوزن:فهم واحترام سعة الوزن للأرفف والأسطح
- تثبيت آمن:قم بتركيب أحزمة مضادة للانقلاب للقطع الطويلة، خاصة في المنازل التي يوجد بها أطفال أو حيوانات أليفة
سلامة الأطفال والحيوانات الأليفة:فكر في اتخاذ تدابير أمان إضافية مثل واقيات الزوايا، أو أقفال الأدراج، أو مزاليج الخزانة إذا كان لديك أطفال صغار أو حيوانات أليفة.
التوثيق
احتفظ بالمعلومات المهمة للرجوع إليها في المستقبل:
- تعليمات المتجر:احتفظ بتعليمات التجميع في مجلد للرجوع إليها في المستقبل
- معلومات الضمان:ملف بطاقات الضمان والإيصالات
- إرشادات الصيانة:لاحظ أي تعليمات خاصة بالعناية
- الأجزاء المتبقية:قم بتخزين الأجهزة الإضافية في كيس مُعلَّم مُرفق بالأثاث (شريط أسفل الدرج) أو في حاوية مُخصصة لذلك
هذه اللمسات النهائية لا تكمل مظهرك فحسب تجميع الأثاث لا يقتصر الأمر على تحسين مظهر المشروع فحسب، بل يُحسّن أيضًا من أدائه ووظائفه وعمره الافتراضي. إن تخصيص الوقت اللازم لتشطيب أثاثك الجديد وتجميعه بشكل صحيح يُكافئك بقطع تبدو في أبهى صورها وتعمل بكفاءة لسنوات قادمة.
إن الشعور بالرضا الناتج عن التراجع ورؤية قطعة أثاث مجمعة بشكل جميل وموضعة بشكل صحيح هو المكافأة الحقيقية تجميع الأثاث بنفسك.
كيفية تجميع أي شيء | دليل أثاث DIY
متى يجب عليك الاتصال بالمتخصص
بينما تجميع الأثاث بنفسك يمكن تحقيق ذلك في العديد من المشاريع، إلا أن بعض الحالات تتطلب مساعدة متخصصة. معرفة متى يجب طلب المساعدة توفر الوقت، وتمنع الأضرار، وتضمن السلامة.
التعرف على متى يكون التجميع معقدًا للغاية
خذ بعين الاعتبار الحصول على مساعدة مهنية عندما:
- تبدو التعليمات ساحقة:إذا لم تتمكن من فهم دليل التجميع بعد المراجعة الدقيقة
- التعقيد الهيكلي:الأثاث ذو الآليات المعقدة مثل أسرة الحائط، والأرائك المتكئة، أو المكاتب القابلة للتعديل
- مخاوف بشأن الحجم والوزن:قطع كبيرة جدًا أو ثقيلة تتطلب عدة أشخاص للتعامل معها بأمان
- المتطلبات الفنية:العناصر التي تحتاج إلى أعمال كهربائية أو تثبيت دائم على هياكل المباني
- استثمارات قيمة:أثاث فاخر حيث يمكن أن تكون الأخطاء مكلفة
أسئلة التقييم الذاتي:
- هل لديك الأدوات والمساحة اللازمة؟
- هل لديك الوقت الكافي لإكمال التجميع بشكل صحيح؟
- هل لديك القدرة الجسدية على التعامل مع المكونات بأمان؟
- هل سبق لك أن قمت بتجميع عناصر مماثلة بنجاح؟
إذا أجبت بـ "لا" على أسئلة متعددة، فقد يكون التجمع المهني هو الخيار الأكثر حكمة.
فوائد الاستعانة بشركة تجميع أثاث محترفة
يقدم المجمعون المحترفون العديد من المزايا:
- خبرة:قام المحترفون بتجميع مئات أو آلاف القطع، مما أدى إلى تطوير مهارات الكفاءة وحل المشكلات
- الأدوات المناسبة:إنهم يأتون مزودين بأدوات متخصصة لتجميع الأثاث
- كفاءة الوقت:ما قد يستغرق ساعات أو أيامًا يمكن إكماله في جزء بسيط من الوقت
- نتائج مضمونة:تقدم العديد من الخدمات المهنية ضمانات على عملها
- انخفاض التوتر:التخلص من الإحباط الذي قد يأتي مع التجميع المعقد
- أمان:يعرف المحترفون كيفية التعامل مع العناصر الثقيلة وتجنب الإصابة
اعتبارات التكلفة والفائدةعند تقييم تكلفة التجميع الاحترافي، ضع في الاعتبار قيمة وقتك، وعمليات شراء الأدوات المحتملة، وخطر إتلاف الأثاث.
العثور على خدمات تجميع الأثاث ذات السمعة الطيبة
خيارات للعثور على المساعدة المؤهلة:
- خدمات التجزئة:يقدم العديد من تجار التجزئة للأثاث خدمات التجميع في وقت الشراء
- شركات التجميع المتخصصة:تتخصص خدمات مثل TaskRabbit أو Handy أو Amazon Home Services في تجميع الأثاث
- خدمات الصيانة المحلية:غالبًا ما يقدم المقاولون المستقلون خدمات التجميع
- التوصيات:اسأل الأصدقاء أو العائلة أو الجيران عن التوصيات الموثوقة
فحص المهنيين:
- تحقق من المراجعات والتقييمات على المنصات أو وسائل التواصل الاجتماعي
- التحقق من تغطية التأمين
- اسأل عن الخبرة مع العلامات التجارية أو أنواع الأثاث المحددة
- اطلب معلومات التسعير الواضحة مقدمًا
- تأكد ما إذا كان التخلص من التغليف مشمولاً
اعتبارات التكلفة المحتملة
تختلف رسوم التجميع المهني بناءً على عدة عوامل:
| نوع الأثاث | نطاق التكلفة النموذجي | تقدير الوقت |
|---|---|---|
| مكتبة بسيطة | $40-$80 | 30-60 دقيقة |
| إطار السرير | $80-$150 | 1-2 ساعة |
| طاولة طعام وكراسي | $100-$200 | 1-3 ساعات |
| مركز ترفيهي | $120-$250 | 2-4 ساعات |
| مكتب | $100-$200 | 1-3 ساعات |
| خزانة الملابس/الخزانة | $150-$300 | 2-4 ساعات |
عوامل التكلفة الإضافية:
- الموقع الجغرافي
- تعقيد النموذج المحدد
- رسوم الخدمة العاجلة
- مواعيد نهاية الأسبوع أو المساء
- رسوم السلالم للمنازل متعددة الطوابق
- رسوم الخدمة الدنيا
خدمات ذات قيمة مضافة:يقدم بعض المجمعين خدمات إضافية مثل وضع الاثاث، التخلص من العبوات، أو تركيب أجهزة التلفاز والأرفف على الجدران.
العمل بفعالية مع المجمعين المحترفين
للحصول على أقصى استفادة من خدمات التجميع الاحترافية:
- مساحة خالية:قم بإعداد منطقة التجمع قبل وصولهم
- التحقق من المخزون:إذا كان ذلك ممكنًا، تأكد من وجود جميع الأجزاء قبل الموعد
- تواصل التوقعات:ناقش بالضبط المكان الذي تريد وضع القطعة المجمعة فيه
- كن متاحا:ابق متاحًا للإجابة على الأسئلة أثناء التجمع
- فحص العمل:تحقق من القطعة النهائية جيدًا قبل مغادرة المجمع
تذكر أنه حتى مع التجميع الاحترافي، يجب عليك الاستمرار في تنفيذ جميع خطوات التشطيب نفسها: التنظيف، والتسوية، وإجراء فحوصات السلامة قبل استخدام الأثاث.
بينما تجميع الأثاث بنفسك يوفر الرضا والتوفير في التكاليف، فلا حرج في إدراك أن المساعدة المهنية هي الخيار الأمثل. الأثاث عالي الجودة استثمارٌ كبير، والتركيب السليم يضمن لك التمتع بكامل قيمته لسنوات قادمة.
خاتمة
بنجاح تجميع الأثاث الجاهز يُحوّل القطع الجاهزة إلى قطع عملية وجميلة تُضفي لمسة جمالية على مساحة معيشتك. غطينا في هذا الدليل الجوانب الأساسية لتجميع الأثاث، بدءًا من التحضير واختيار الأدوات، وصولًا إلى التقنيات المتقدمة واللمسات النهائية الاحترافية.
التجميع الجيد هو أساس عمر الأثاث. فالقطعة المُجمّعة جيدًا تضمن سنوات من الخدمة الموثوقة، بينما قد يتذبذب الأثاث المُجمّع على عجل أو بشكل غير صحيح، أو ينكسر، أو يتلف قبل الأوان. الوقت المُستثمر في التجميع الدقيق يُؤتي ثماره من حيث المتانة والأداء.
ال تجميع الأثاث بنفسك لا تقتصر هذه العملية على توفير التكاليف فحسب، بل تمنحك شعورًا بالرضا عن صنع شيء ملموس بيديك. كل مشروع مُنجز يبني ثقةً ومهاراتٍ تُنقل إلى مهام التجميع المستقبلية ومشاريع تحسين المنزل الأخرى.
تذكر هذه النقاط الرئيسية:
- التحضير أمر بالغ الأهمية: اقرأ التعليمات بعناية، وقم بجرد جميع الأجزاء، وقم بتنظيم مساحة العمل الخاصة بك قبل البدء
- استخدم الأدوات المناسبة للعمل: الأدوات عالية الجودة تجعل التجميع أسهل وتقلل من خطر التلف
- اتبع التسلسل: قاوم الرغبة في التخطي للأمام في التعليمات
- لا تجبر المكونات: إذا لم تتناسب القطع، فتوقف وأعد التقييم بدلاً من إجبارها
- خذ وقتك: التسرع يؤدي إلى أخطاء تؤثر على المظهر والسلامة الهيكلية
- وضع اللمسات النهائية: التنظيف والتسوية والوضع المناسب يكمل عملية التجميع
- اعرف متى تطلب المساعدة: بعض المشاريع تستفيد من المساعدة المهنية
نشجعكم على مشاركة تجاربكم ونصائحكم وأسئلتكم في قسم التعليقات أدناه. قد تساعد آراؤكم القراء الآخرين في مشاريعهم، ويمكن لمجتمعنا مساعدتكم في التغلب على التحديات التي واجهتموها.
ابدأ بتجميع أثاثك بثقة!
بفضل المعرفة والتقنيات ومهارات استكشاف الأخطاء وإصلاحها التي يغطيها هذا الدليل، ستكون جاهزًا تمامًا لبدء مشروع تجميع أثاثك القادم بثقة. كل قطعة تجمعها بنجاح تُثري مهاراتك وتُضفي لمسةً مميزة على مساحة معيشتك.
الأسئلة الشائعة
كم من الوقت يستغرق تجميع الأثاث عادةً؟
يختلف وقت التجميع اختلافًا كبيرًا حسب نوع الأثاث وتعقيده. قد تستغرق القطع البسيطة، مثل رف الكتب البسيط، من 30 إلى 60 دقيقة، بينما قد تستغرق القطع الأكثر تعقيدًا، مثل خزائن الملابس أو مراكز الترفيه، من ساعتين إلى أربع ساعات أو أكثر. على من يقومون بالتجميع لأول مرة التخطيط لضعف الوقت المقدر في دليل الشركة المصنعة تقريبًا.
ماذا يجب أن أفعل إذا كانت هناك أجزاء مفقودة من مجموعة الأثاث الخاصة بي؟
أولاً، افحص جميع مواد التغليف ومنطقة التجميع بدقة. إذا كانت هناك أي أجزاء مفقودة، فتواصل مع الشركة المصنعة مباشرةً باستخدام معلومات خدمة العملاء المرفقة مع عملية الشراء. معظم الشركات الموثوقة تُشحن قطع الغيار مجانًا. يُسهّل تجهيز رقم الطراز وتاريخ الشراء ومعلومات الأجزاء المفقودة هذه العملية.
هل يستحق الأمر إنفاق أموال إضافية على أدوات ذات جودة أفضل لتجميع الأثاث؟
إذا كنت تخطط لتجميع عدة قطع أثاث على مدى فترة زمنية طويلة، فإن الاستثمار في أدوات أساسية عالية الجودة أمرٌ مُجدٍ. استخدام مفكات براغي جيدة، ومفاتيح ألين، ومثقاب مزود برؤوس مفكات براغي يُسهّل عملية التجميع ويُقلل من خطر نزع البراغي أو إتلاف الأثاث. مع ذلك، بالنسبة لمشروع تجميع لمرة واحدة، عادةً ما تكون الأدوات المُرفقة كافية إذا استُخدمت بعناية.
كيف يمكنني جعل الأثاث الذي قمت بتجميعه أكثر استقرارًا؟
هناك العديد من التقنيات التي يمكن أن تعمل على تحسين الاستقرار: تأكد من إحكام جميع أدوات التثبيت بشكل صحيح (ولكن ليس بشكل مفرط)، أضف غراء الخشب إلى وصلات المسامير حيثما أمكن، استخدم حوامل الأثاث لتقوية وصلات الزوايا، تأكد من وضع الأثاث على سطح مستو، وفكر في إضافة دعامات متقاطعة إلى وحدات الرفوف المعرضة للحركة الجانبية.
هل يمكنني تفكيك وإعادة تركيب أثاث RTA عند الانتقال؟
يمكن تفكيك معظم أثاث RTA للنقل، إلا أنه قد لا يحتفظ بنفس مستوى الثبات بعد عدة عمليات تجميع. التقط صورًا قبل التفكيك، ووضّع جميع القطع المعدنية في أكياس وملصقات، واحمِ فتحات البراغي ونقاط التوصيل أثناء النقل. قد تتآكل بعض أنواع التوصيلات، وخاصةً تلك التي تستخدم أقفال كام، مع الاستخدام المتكرر، مما قد يتطلب تقوية أثناء إعادة التجميع.