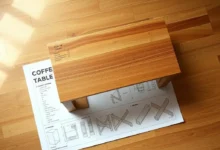
طاولة قهوة اصنعها بنفسك: خطة عمل من 5 خطوات وأبعادها
هل تعلم أنه يمكنك صنع طاولة قهوة متينة من خشب الصنوبر الرقائقي والمنصات الخشبية بتكلفة أقل من أسعار المتاجر؟ هذا الدليل مناسب للمبتدئين والمحترفين على حد سواء. يوضح كيفية صنع طاولة قهوة تناسب مساحتك وأسلوبك.
يمكن أن تكون أبعاد الطاولة ٥٨ بوصة طولًا × ٢٢ بوصة عرضًا × ١٨.٥ بوصة ارتفاعًا، أو مربعًا أصغر حجمًا ١٦ بوصة × ٣٠ بوصة. ستستخدم أدوات مثل منشار الطاولة ومنشار المتراس. ستقطع الألواح وتجمعها، وتثبت الأرجل، ثم تُطلى بصبغة فولك آرت.
لا يوجد جدولان متماثلان. يمكنك خلط المواد مثل غراء تايتبوند 3 ومسامير الجبس بقياس 2.5 بوصة. هذا يُتيح لك إنشاء تصميمات ريفية و الأنماط الحديثة.
النقاط الرئيسية
- اتبع عملية مكونة من 5 خطوات لبناء طاولة قهوة منزلية الصنع من البداية إلى النهاية.
- اختر من الأبعاد القياسية (58 بوصة طول × 22 بوصة عرض) أو مربع 16 بوصة × 30 بوصة تصميم.
- يستخدم مواد مثل الخشب الرقائقي الصنوبري والمنصات لتقليل التكاليف مع الحفاظ على الجودة.
- تضمن الأدوات مثل المثقاب وأداة التثبيت التجميع الدقيق والمتانة.
- قم بتخصيص التشطيبات باستخدام البقع أو البولي يوريثين أو الشمع العتيق لتتناسب مع ديكورك.
بناء طاولة قهوة اصنعها بنفسك الأمر لا يقتصر على توفير المال، بل يتعلق بالإبداع. ستقطع ١٠ ألواح باستخدام منشار طاولة، ثم تجمعها بدبابيس خشبية. ستنتهي بطبقتين من البولي يوريثان.


يمكنك الاختيار بين منزل ريفي أو منزل من منتصف القرن التصميم الحديثيتم التأكيد على السلامة في كل خطوة من خلال حماية الأذن ونظارات السلامة.
في النهاية، ستحصل على قطعة عملية مصنوعة من مواد مثل مسامير 2×8 وبراغي جبسية 2.5 بوصة. حتى المبتدئين يتقنون القطع المائل والصنفرة. هذا يُحوّل الخشب الخام إلى طاولة قهوة تُثير الأحاديث. ابدأ اليوم واصنع قطعة مركزية مُخصصة لغرفة معيشتك.
مقدمة لمشاريع طاولة القهوة DIY
بناء طاولة اصنعها بنفسك هو أكثر من مجرد صنع أثاثيتيح لك تصميم قطعة مخصصة تناسب مساحتك تمامًا. كما يمكنك توفير ما يصل إلى 60% مقارنةً بشراء واحدة.
ال طاولة قهوة خشبية اصنعها بنفسك التصميم بأسعار معقولة. يمكنك البدء بمواد مثل خشب البلوط أو الصنوبر المُعاد تدويره بأقل من $100. حتى مع التحسينات، يبقى أرخص بكثير من شراء واحدة.
فوائد بناء طاولة القهوة الخاصة بك
- كفاءة التكلفة: وفر 40–60% عن طريق تجنب رسوم الهامش والشحن.
- تصميم مخصص: اختر الأبعاد والبقع والأجهزة لتتناسب مع أي ديكور.
- جودة دائمة: خشب صلب يتفوق البناء على طاولات اللوح الخشبي المنتجة بكميات كبيرة.
متطلبات مستوى المهارة
ليس لديك خبرة؟ لا تقلق. هذا المشروع هو مستوى المهارة 1/5مثالي للمبتدئين. ما عليك سوى معرفة أساسيات الأدوات مثل المثاقب والمناشير.
معظم الخطوات بسيطة، مثل حفر الثقوب أو الصنفرة. ستحتاج إلى منشار ميتري، ومثقاب/مفك، ومشابك. لا تنسَ نظارات واقية وكمامة واقية من الغبار حفاظًا على سلامتك.
توقعات استثمار الوقت
يستغرق إنجازه من ٦ إلى ١٢ ساعة على مدار يومين إلى ثلاثة أيام. تأكد من تخصيص وقت إضافي لتجفيف التشطيبات أو تصلب الغراء.
قسّم المهام إلى أجزاء أصغر. على سبيل المثال، قصّ الأجزاء في يومٍ وجمّعها في اليوم التالي. بهذه الطريقة، لن تتسرّع وستحصل على نتيجةٍ نهائيةٍ سلسة.
المواد الأساسية لطاولة القهوة الخشبية الخاصة بك
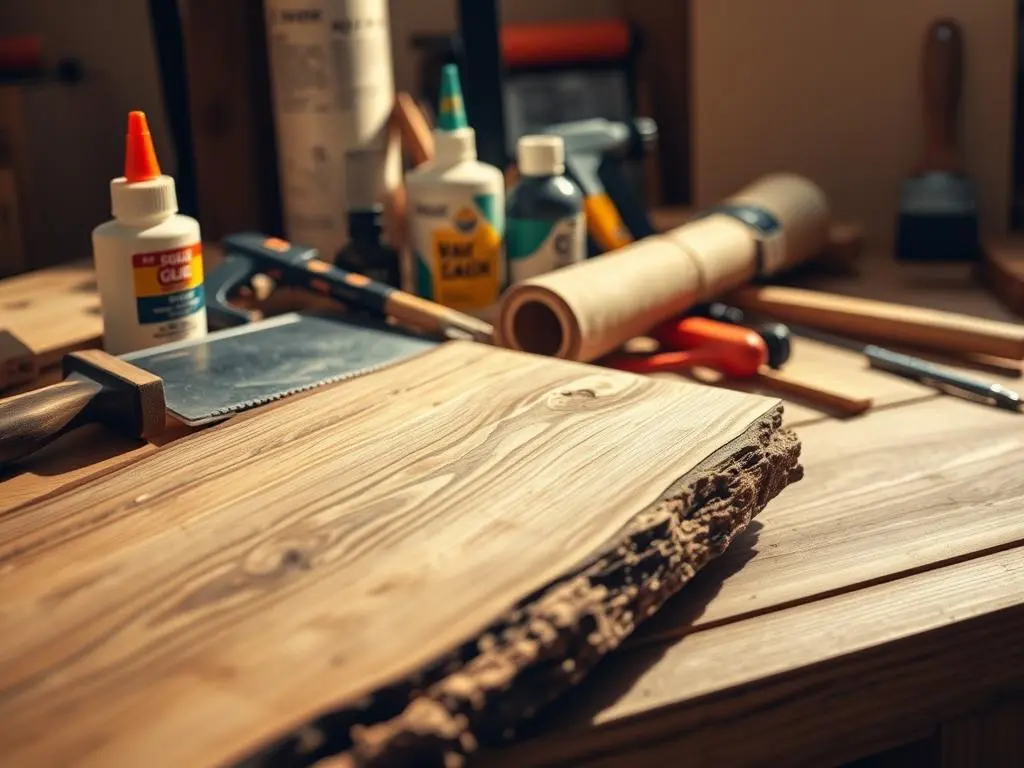
يعد اختيار المواد المناسبة أمرًا أساسيًا طاولة قهوة اصنعها بنفسك يدوم طويلاً ويبدو جميلاً. ابدأ بـ 5-6 قطع من خشب التأطير بمقاس 2×6×8 للقاعدة والأرجل. يُعدّ خشب الصنوبر أو البلوط أو الجوز خيارات رائعة. يتراوح سعر خشب الصنوبر بين 15 و25 دولارًا أمريكيًا للوح الواحد، وخشب البلوط بين 15 و45 دولارًا أمريكيًا للوح الواحد، وخشب الجوز بين 75 و95 دولارًا أمريكيًا للوح الواحد.
قم دائمًا بشراء الخشب الإضافي 10% لتغطية أي أخطاء.
- أنواع الخشب: يستخدم الخشب الصلب للطاولات (على سبيل المثال، خشب البلوط من أجل المتانة، والجوز من أجل الأناقة) والأخشاب الأكثر نعومة مثل الصنوبر للأرجل لتوفير التكاليف.
- المثبتات: براغي جيب بقياس ١ ١/٤ بوصة وغراء خشب لتكوين وصلات قوية. اشترِ ٤ أرجل مخروطة (جاهزة أو مقطوعة من خشب ٤×٤).
- لوازم التشطيب: صبغة خشب (زيتية أو هلامية)، ربع جالون، وطبقة نهائية واقية مثل البولي يوريثان. أضف ورق صنفرة (بحبيبات ٨٠، ١٢٠، و٢٢٠) لتنعيم الحواف.
الخشب المستصلح يُضفي لمسة ريفية، ولكنه يحتاج إلى صنفرة إضافية. يمكنك أيضًا إضافة طبقة أساس أو طلاء للحصول على لون مميز. ولكن، تجنب خلط أنواع الخشب إلا إذا كنت ترغب في مظهر متعدد الطبقات. تأكد دائمًا من نسبة الرطوبة (أقل من 12% للمشاريع الداخلية) لمنع الالتواء.
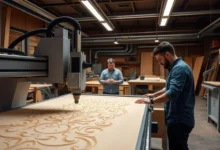
الأدوات والمعدات المطلوبة
إن بناء طاولة القهوة يحتاج إلى الأدوات المناسبة دليل طاولة القهوة خطوة بخطوة. سواء كنت تستخدم خطط طاولة القهوة بنفسك سواءً كنتَ تعمل على تصميمك الخاص، فالأدوات المناسبة هي الأساس. فهي تساعدك على العمل بدقة وأمان. إليك دليل لمساعدتك في تجهيز ورشة العمل الخاصة بك.
الأدوات اليدوية الأساسية
وهنا الأساسيات أدوات يدوية ستحتاج إلى:
- سكين Hammer وWORKPRO Premium متعدد الاستخدامات
- مفكات براغي فيليبس ومفكات براغي مسطحة الرأس
- 4+ مشابك (على سبيل المثال، مشابك القضبان أو الأنابيب)
- مسطرة معدنية من Mr. Pen (6 بوصات أو 12 بوصة)
- صنفرة يدوية أو ورق صنفرة
لميزانية محدودة، استخدم شريطًا لاصقًا لتثبيت سريع. يمكنك أيضًا استخدام أربطة مطاطية بدلًا من المشابك.
أدوات كهربائية تجعل العمل أسهل
فيما يلي الأدوات الكهربائية التي ستحتاجها:
- الحفر (على سبيل المثال، دي والت أو بوش)
- منشار ميتري للقطع بزاوية
- كريج جيج برو 3 لثقوب الجيب
- صنفرة مدارية عشوائية (ماركة AXUS)
الأدوات اللاسلكية رائعة للتنقل. لكن كن دائمًا حذر باستخدام المناشير. إذا لم تجد أداة، فكّر في استئجار واحدة.
أدوات القياس والتمييز
للحصول على قياسات دقيقة، ستحتاج إلى:
| أداة | وظيفة | أفضل العلامات التجارية |
|---|---|---|
| شريط قياس | الأطوال والعروض | السيد بن |
| مربع مركب | الزوايا والحواف | الجيش السويسري |
| مستوى | فحوصات استقرار الجدول | مستوى الطوربيد |
| قلم تحديد | أدلة واضحة للقطع | ستيدلر |
تأكد دائمًا من قياساتك قبل القطع. للخطوط الطويلة، استخدم خطًا بالطباشير.
الخطوة 1: تخطيط طاولة القهوة الخاصة بك: الأبعاد والتصميم
التخطيط الخاص بك طاولة قهوة اصنعها بنفسك اختيار المقاس المناسب لمساحتك وأسلوبك هو مفتاح اختيار تصميم كلاسيكي أو تصميم مُخصص. ابدأ بالأحجام القياسية: الطول 36-48 بوصة، العرض 18-24 بوصة، والارتفاع 16-18 بوصة. هذه الأحجام هي أساس طاولة قهوة عملية.
للمساحات الفريدة، عدّل هذه الأحجام مع مراعاة استخدامها. يُعدّ المخطط التفصيلي أمرًا بالغ الأهمية، فهو يضمن توافق كل قطع ومفصل مع رؤيتك.

أبعاد طاولة القهوة القياسية
- طول: 36–48 بوصة لمعظم غرف المعيشة (على سبيل المثال، سطح زجاجي مقاس 36 بوصة يناسب المساحات المدمجة)
- عرض: 18-24 بوصة لتجنب ازدحام الممرات
- ارتفاع: 16-18 بوصة تتناسب مع مستويات وسادة الأريكة النموذجية
تخصيص القياسات لمساحتك
قِس مساحة جلوسك بحيث تترك مساحة 18 بوصة حول الطاولة. الطاولات المنخفضة تناسب الأرائك العصرية، بينما الطاولات الطويلة تناسب الأرائك التقليدية. جرّب شكل حرف U أو حرف L للمساحات الزاوية، مثل تصاميم نوغوتشي.
اضبط العمق والعرض، مع الحفاظ على ثباتهما. لا تتجاوز 48 بوصة إلا إذا كانت غرفتك تسمح بذلك.
إنشاء مخطط عمل
ارسم تصميمك بمقياس (¼ بوصة = قدم واحد) لمعرفة الحجم. استخدم خشبًا رقائقيًا بسمك 1.5 بوصة للقواعد، وشرائح 1×4 لأسطح الطاولات. انتبه إلى النجارة: غراء Weldbond ومسامير جيب 1¼ بوصة تُسهّل عملية التجميع.
نزّل قوالب مجانية لأنماط مثل النمط الريفي أو الصناعي. ثم اضبط المقاسات مع الحفاظ على متانتها. أكمل مخططاتك بتحديد قطع المواد ونقاط التثبيت، مثل مثبتات على شكل رقم 8 لضمان ثبات سطح الطاولة.
الخطوة 2: قطع الخشب وتحضيره
بناء طاولة قهوة اصنعها بنفسك يبدأ بقطع دقيقة. ابدأ بوضع علامات على جميع القطع وفقًا لمخططك. استخدم دليل طاولة القهوة خطوة بخطوة للحصول على قياسات دقيقة.
لألواح الخشب الخام، اقطع أولاً أجزاءً باستخدام منشار طاولة أو منشار دائري. إذا كنت تستخدم خشب ألدر ذي عقد 4/4 أو 6/4، فاسوِ الألواح بسمك 1 1/2 بوصة.
"بمجرد وضع علامة على جميع القطع، يمكننا البدء في القطع... تأكد من اتباع علاماتك عن كثب للحصول على قطع دقيقة."
بعد ذلك، استخدم أداة Kreg Jig لحفر ثقوب جيب بقطر 1 1/2 بوصة في نهايات الألواح. بالنسبة لأسطح الطاولات، رتّب الألواح بدقة لضمان تناسق نمط العروق. افحص كل قطعة باستخدام مسطرة النجار للتأكد من زواياها القائمة.
إذا كانت الحواف غير متساوية، قم برملها باستخدام ورق صنفرة بحجم 80 قبل المضي قدمًا.
- قم بوضع علامة على جميع القطع باستخدام قلم رصاص حاد ومسطرة
- اختبار القطع على الخشب الخردة أولاً
- قم بربط الألواح معًا عند التخطيط للأسطح المستوية
عند تركيب الألواح، احفر ثقوبًا تجريبية مسبقًا لمنع انقسامها. لطاولات التخزين المخفية (60 بوصة × 36.25 بوصة)، اقطع صناديق أدراج من الخشب الرقائقي بسمك 3/4 بوصة باستخدام براغي جيب بسمك 1 1/4 بوصة. قِس دائمًا مرتين قبل القطع، فهذه الخطوة تُحدد دقة المشروع النهائي.
نصيحة احترافية: ربط الحواف يجب أن تتناسب المواد مع نوع الخشباستخدم صنفرة حزامية لتنعيم الأسطح قبل وضع حشو الخشب. هذه الخطوة الأساسية تضمن محاذاة جميع المكونات بدقة في مراحل التجميع اللاحقة.
الخطوة 3: تجميع قاعدة الطاولة
إن إنشاء قاعدة صلبة أمر ضروري لأي طاولة قهوة منزلية الصنعابدأ بوضع الأرجل، التي يمكن أن تكون على شكل حرف U أو حرف L، على خشب بلوط مُعاد تدويره مقاس 4×4، مقطوع إلى 18 بوصة. تأكد من تساوي المآزر بين الأرجل لتحقيق التوازن. يُعدّ جهاز Kreg Jig أساسيًا هنا، حيث يُنشئ نقاط تثبيت مخفية عن طريق حفر ثقوب في نهايات المآزر.
- احفر ثقوبًا جيبية بقطر ١.٥ بوصة في طرف المئزر باستخدام نظام Kreg. ثم ثبّت الأرجل باستخدام براغي بقطر ٢.٥ بوصة وغراء خشب.
- قم بتعزيز الزوايا باستخدام أقواس معدنية على شكل حرف L أو كتل خشبية لمزيد من القوة.
- استخدم مقياس المثلث 3-4-5: قِس 3 أقدام على طول أحد المئزرين، و4 أقدام على التالي. إذا كان قطر المئزر 5 أقدام، فالقاعدة مربعة.
لتجميع الأرجل، قم بصنفرتها أو تشكيل الخشب ذي الأبعاد باستخدام جهاز التوجيه. ثبّت الأرجل على إطار المئزر باستخدام براغي جيبية مقاس 1-1/4 بوصة. تضمن أداة Kreg Rip-Cut قطعًا دقيقًا ومسافات متساوية. تحقق من ثبات الأرجل بوضع ميزان على جميع الأرجل الأربعة. إذا كانت غير مستوية، فاضبطها باستخدام الحشوات.
القاعدة المتذبذبة تعني فشل المشروع. اختبرها بهزّ الطاولة برفق، وإذا تحركت، عزز المفاصل قبل المتابعة.
أكمل القاعدة بتثبيت رف الخشب الرقائقي بقياس 3/4 بوصة (35-1/2 بوصة × 21-5/8 بوصة) على المآزر باستخدام مسامير براد بقياس 1-1/4 بوصة. استخدم مكعبات مشروع Kreg لتثبيت المكونات في مكانها أثناء عملية اللصق. هذه الخطوة تُحوّل المواد الخام إلى قاعدة عملية لمنزلك. اصنع طاولة القهوة بنفسكجاهز للطاولة.
الخطوة 4: بناء سطح الطاولة وتركيبه
اختر ألواح الصنوبر مقاس 2×6 لمنزلك طاولة اصنعها بنفسك أعلى. ضع ألواحًا بمسافات ١/٨ بوصة لتوسيع الخشب. رتّب أنماط العروق بشكل متناسق لزيادة الجمال والمتانة.
- يقوم مارك بالقطع باستخدام مربع النجار، ثم يقطع بشكل نظيف باستخدام منشار دائري.
- احفر ثقوبًا جيبية بقطر ١.٥ بوصة في طرف اللوح باستخدام قالب كريج. ثبّت الألواح ببراغي بقطر ٢.٥ بوصة وغراء خشب، وثبتها جيدًا حتى تثبت.
- أضف أطراف لوح التوصيل عن طريق حفر ثقوب مسامير بقطر ٢٢ مم. أدخل مسامير لاصقة لمقاومة الالتواء. املأ اللحامات بسدادات لمظهر متناسق.
ثبّت سطح الطاولة بالقاعدة رأسًا على عقب. ثبّت الإطار فوق الألواح، ثم ثبّته بمشابك على شكل حرف Z أو ثقوب براغي طويلة. استخدم أقواسًا على شكل حرف L للتدعيم، بتكلفة أقل من $6 للواحدة. ضع غراء الخشب على المفاصل لمزيد من المتانة.
اختبر ثبات القاعدة بتحريكها برفق. اضبط الأرجل باستخدام الحشوات إذا كانت متذبذبة. إجمالي تكلفة المواد: ٢٥٠ مسمارًا خشبيًا (١TP٤T٨٠)، وغراء خشب (١TP٤T١٠)، وألواح صنوبر ٢×٦. صنفرة الأسطح لتنعيمها قبل التشطيب.
الخطوة 5: صقل وتشطيب طاولة القهوة التي صنعتها بنفسك
الانتهاء من طاولة قهوة منزلية الصنع عملية مُفصّلة. فهي تحمي الطاولة وتُجمّلها. سواء كنت تستخدم خطط طاولة القهوة بنفسك أو عند إنشاء التصميم الخاص بك، فإن الصنفرة والتشطيب الصحيحين هما المفتاح.
قم برملها باستخدام ورق صنفرة بحجم 80 لإزالة علامات المنشار والبقع غير المستوية.
انتقل إلى 180 حبيبة للحصول على سطح أكثر نعومة.
استخدم أداة دوارة Dremel 8240 للحواف والمنحنيات ذات الأقراص ذات الحبيبات 220.
قم بإنهاء العمل باستخدام ورق الصنفرة ذو الحبيبات 400 للحصول على ملمس حريري قبل التلوين.
للحصول على ألوان نابضة بالحياة، اختر البقع مثل Minwax Wood إنهاء أو هلام البقع. ضعه بفرشاة أو قطعة قماش، ثم امسح الزائد. اتركه يجف لمدة 6-8 ساعات. للعزل، لديك عدة خيارات:
| نوع التشطيب | الايجابيات | سلبيات | الأفضل لـ |
|---|---|---|---|
| البولي يوريثين | متين ومقاوم للماء | يتطلب تنظيفًا متساويًا بالفرشاة | المناطق ذات حركة المرور الكثيفة |
| الشمع | سهولة الاستخدام، مظهر طبيعي | عرضة للخدش | الأسطح ذات الاستخدام الخفيف |
| اللك | يجف بسرعة | أقل متانة | لمسات زخرفية |
ضع طبقتين من البولي يوريثان، مع صنفرتهما بحبيبات 200 بينهما. الفحص النهائي يضمن نعومة كل شيء. مع اللمسة النهائية المناسبة، يصبح خشبك الخام رائعًا. طاولة قهوة منزلية الصنع الذي يعزز أي غرفة.
أنماط طاولة القهوة الشائعة التي يمكنك صنعها في المنزل
قم بتحويل مساحة المعيشة الخاصة بك مع خطط طاولة القهوة تعكس ذوقك. تصميم طاولة القهوة يُمكّنك من المزج بين الجمالية والوظيفة. استكشف أربعة تصاميم تناسب أي ديكور منزلي.
تصميم ريفي للمزرعة
استمتع بأجواء ريفية مع الخشب المُعاد تدويره والقواعد المُدعّمة على شكل حرف X. حسّن مظهر الأسطح بصنفرة الحواف أو استخدام التزجيج للحصول على مظهر عتيق. استخدم خشب الصنوبر أو البلوط لإضفاء لمسة ريفية كلاسيكية.
النهج الحديث في منتصف القرن
يُميز هذا التصميم أرجل مدببة بزاوية ١٥ درجة. نسق خشب الجوز أو خشب الساج مع خطوط أنيقة. اختر أسطح طاولات عائمة باستخدام مسامير خشبية بقياس ⅜ بوصة لضمان عدم وجود فواصل.
عناصر الطراز الصناعي
يمتزج المعدن والخشب في التصاميم الصناعية. ثبّت أرجل الأنابيب الفولاذية واستخدم حوامل مجلفنة للثبات. أضف عجلات لسهولة الحركة، واجمع بين الفولاذ والخشب المُعاد تدويره لإضفاء تباين.
خيارات معاصرة بسيطة
خطوط أنيقة ونجارة مخفية تُضفي لمسةً من البساطة على الطاولات. استخدم خشبًا رقائقيًا بسمك ¼ بوصة للأسطح الملساء. أضف مساحة تخزين مدمجة مع أدراج بأزرار بسمك ⅜ بوصة. اختر ألوانًا فاتحة لإبراز الخطوط النظيفة.
| أسلوب | الميزات الرئيسية | مواد | نصائح |
|---|---|---|---|
| مزرعة ريفية | تشطيبات متهالكة، دعامات على شكل حرف X | الخشب المستصلح، غراء الخشب | استخدم ورق الصنفرة لإنشاء طبقة خارجية |
| منتصف القرن الحديث | أرجل مدببة، قمم عائمة | الجوز، خشب الساج، مسامير خشبية مقاس ½ بوصة | أرجل زاوية 15 درجة لضمان الأصالة |
| صناعي | لمسات معدنية، عجلات | أنابيب فولاذية، أقواس مجلفنة | يتناسب مع درجات ألوان الخشب المتآكلة |
| الحد الأدنى | مفاصل مخفية، تخزين | الخشب الرقائقي، التشطيبات غير اللامعة | استخدم ورق الصنفرة بحجم 220 للحصول على حواف ناعمة |
سواء اخترت سحر المزرعة أو الحافة الصناعية، اصنع طاولة القهوة بنفسك تتكيف المشاريع بسهولة. اجمع عناصر من أنماط متعددة لإنشاء قطعة فريدة تناسب مساحتك.
الخلاصة: الاستمتاع بطاولة القهوة المصنوعة يدويًا وعرضها
لك طاولة قهوة اصنعها بنفسك مزيجٌ يجمع بين أسلوبك وعمليتك. يُمكن صنعه من خشبٍ قديم أو بمظهرٍ عصري. يُظهر هذا المشروع إبداعك، ويمكن صنعه بأقل من $200.
ضعه في مكان يُحسّن من مساحة معيشتك. ينبغي أن يكون قريبًا من أماكن جلوس الناس لتشجيعهم على الحديث.
زيّنها بوسائد ونباتات وسلال لإضفاء لمسة ريفية. ولمظهر صناعي، أضف أشكالًا معدنية أو هندسية. استخدم صبغة مينواكس وشمع آني سلون الداكن للحفاظ على مظهرها الجميل. صنفرها أو استخدم فرشاة سلكية لإظهار عمرها، واختر الخشب المُعاد تدويره. الدفء.
يمكنك تنسيقها مع قطع أثاث أخرى على طراز المزرعة للحصول على مظهر موحد.
حافظ على مظهر طاولتك رائعًا بتنظيف أي بقع على الخشب فورًا واستخدام مُرطب الخشب سنويًا. صنع شيء من مواد قديمة يجعلك تشعر بالفخر بكونك صديقًا للبيئة. يُعلّمك هذا المشروع مهارات صنع المزيد من القطع المُخصصة لمنزلك.
بمشاركة قصة طاولتك، تبدأ نقاشات شيقة. هذا يُظهر التزامك بالاستدامة والإبداع. يُظهر لك دليل صنع طاولة قهوة بنفسك كيفية صنع شيء مميز وبسعر معقول. طاولتك ليست مجرد قطعة أثاث؛ إنها رمز لإبداعك.
التعليمات
ما هي المواد التي أحتاجها لبناء طاولة قهوة بنفسي؟
لصنع طاولة قهوة بنفسك، ستحتاج إلى أخشاب عالية الجودة، وأدوات تثبيت، ومواد لاصقة، ومنتجات تشطيب. يمكنك الاختيار بين خشب الصنوبر لخيار اقتصادي، أو خشب البلوط لمشاريع متوسطة التكلفة، أو خشب الجوز لمظهر فاخر. تجد قائمة تسوق مفصلة في الدليل.
كم من الوقت سوف يستغرق لإكمال مشروع طاولة القهوة الخاص بي؟
يستغرق بناء طاولة قهوة عادةً من ٨ إلى ١٢ ساعة على مدار يومين إلى ثلاثة أيام. يشمل ذلك التجميع والتجفيف واللمسات النهائية. أخذ فترات راحة يُحسّن النتيجة.
هل أحتاج إلى خبرة سابقة في النجارة لبناء طاولة القهوة الخاصة بي؟
يمكن للمبتدئين بناء طاولة قهوة باستخدام دليلنا، لكن معرفة الأدوات الأساسية والقياسات تُفيدهم. يقدم دليلنا نصائح للمبتدئين لضمان النجاح.
ما هي الأبعاد القياسية لطاولة القهوة؟
طاولات القهوة القياسية بأطوال تتراوح بين 36 و48 بوصة، وعرض يتراوح بين 18 و24 بوصة، وارتفاع يتراوح بين 16 و18 بوصة. يجب أن تتناسب هذه الأبعاد مع ترتيبات جلوسك للاستخدام العملي.
ما هي الأدوات الأساسية لبناء طاولة القهوة؟
ستحتاج إلى أدوات يدوية أساسية مثل مفكات البراغي والمطارق والمشابك وآلات الصنفرة. تُسرّع الأدوات الكهربائية مثل المثاقب والمناشير وآلات الصنفرة العمل. كما تُعدّ أدوات القياس والترميز أساسيةً لدقة القطع والتجميع.
هل يمكنني تخصيص تصميم طاولة القهوة الخاصة بي؟
نعم! تتيح لك خططنا تخصيص الأبعاد والأسلوب والتشطيب. يمكنك الاختيار من بين تصاميم جمالية متنوعة، مثل تصميم المزرعة، أو طراز منتصف القرن الحديث، أو الطراز الصناعي. صمّم المساحة لتناسب مساحتك تمامًا.
ما هي تقنيات التشطيب التي يجب أن أفكر فيها لطاولة القهوة الخاصة بي؟
استخدم الصنفرة التدريجية وأنواعًا مختلفة من الصبغات، مثل الزيتية أو المائية أو الجل. استخدم تشطيبات واقية، مثل البولي يوريثان أو الورنيش، لضمان المتانة والحفاظ على مظهر طاولتك رائعًا.
كيف يمكنني ضمان استقرار طاولة القهوة الخاصة بي؟
ابنِ قاعدة متينة باستخدام وصلات مثل وصلات الجيب، أو وصلات التجويف، أو وصلات التسنن، أو وصلات المسامير. تأكد من محاذاة الأجزاء، واستخدم دعامات الزوايا، وقم بتركيبها جافًا قبل التجميع للحصول على طاولة مستقرة.
ما هي بعض أنماط التصميم الشائعة لطاولات القهوة التي تصنعها بنفسك؟
تشمل الأنماط الشائعة: الريفي الريفي، وعصري منتصف القرن، والصناعي، والمعاصر البسيط. لكل نمط نصائح إنشائية خاصة به في دليلنا.
كيف يمكنني عرض طاولة القهوة الجاهزة في مساحة المعيشة الخاصة بي؟
رتّب طاولتك مع مراعاة انسيابية الحركة وترتيب الأثاث. يتضمن التصميم الموازنة بين الديكور والوظيفة، مع الحفاظ على سهولة الصيانة للحفاظ على مظهر طاولتك جديدًا.